This is personal note for dpdk pktgen.
now (2019/08), if wants to run dpdk pktgen, it cannot use ubuntu default dpdk packages, it needs to compile pktgen from source code.
Prepare Build environment
Before compile source code, please follow this article to prepare environment
Ubuntu 18.04 ARM64 DPDK in VM (QEMU)
But, Don’t install any ubuntu dpdk packages.
and run following command to install additional basic compile environment
apt-get build-dep -y dpdk linux-image-generic
apt install -y lua5.3 liblua5.3-dev
Download Source Code
Now, download dpdk and pktgen source code.
pktgen will update their source to meet dpdk current version, later pktgen version might not compile successful with old dpdk version.
When I wrote this, it can use latest version dpdk and pktgen together, but it might not work in future.
Download latest dpdk and pktget
git clone git://dpdk.org/dpdk --depth=1
git clone git://dpdk.org/apps/pktgen-dpdk --depth=1
Compile Source Code
Before compile source code, please setup environment, I checkout pktget/dpdk source code on /root, please modify it to fit your environment
export RTE_SDK=/root/dpdk
export RTE_TARGET=build
cd dpdk
make config T=arm64-armv8a-linuxapp-gcc
make -j `nproc` T=arm64-armv8a-linuxapp-gcc
make install
RTE_TARGET should be also use arm64-armv8a-linuxapp-gcc, but when after compile dpdk, it will create library on <source code path>/build/ not <source code path>/arm64-armv8a-linuxapp-gcc , so, this is a workaround to avoid compile here.
Add path to current session
export PATH=$PATH:/usr/loca/bin:/usr/loca/sbin
Compile pktgen
cd pktgen-dpdk
make -j `nproc
After compile it, source code would be located here ./app/build/app/pktgen
Run Pktgen
Pktgen run with one port command
./app/build/app/pktgen -l 0-4 -n 3 -- -P -m "[1:3].0"
two port command
pktgen -l 0-4 -n 3 -- -P -m "[1:3].0, [2:3].1"
PKTGEN with L3FWD
Put l3fwd example command below.
cd /usr/share/dpdk/examples/l3fwd/build
./l3fwd -c 1 -- -p 0x3 --config="(0,0,0),(1,0,0)"
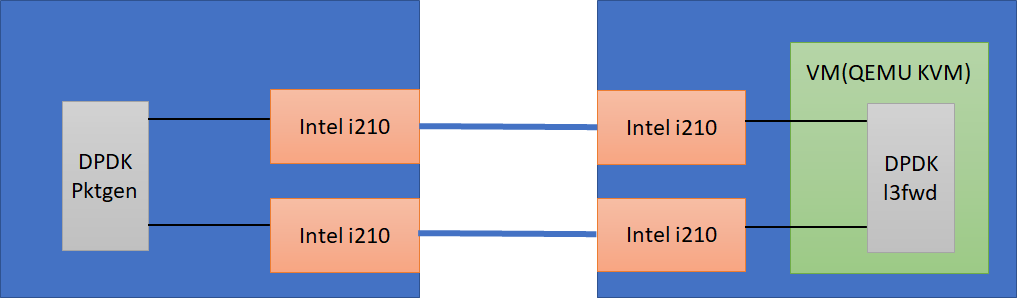
It can reconfigure network topology and use two machines to run this test, on l3fwd side, l3fwd also can run without VM, doesn’t matter.
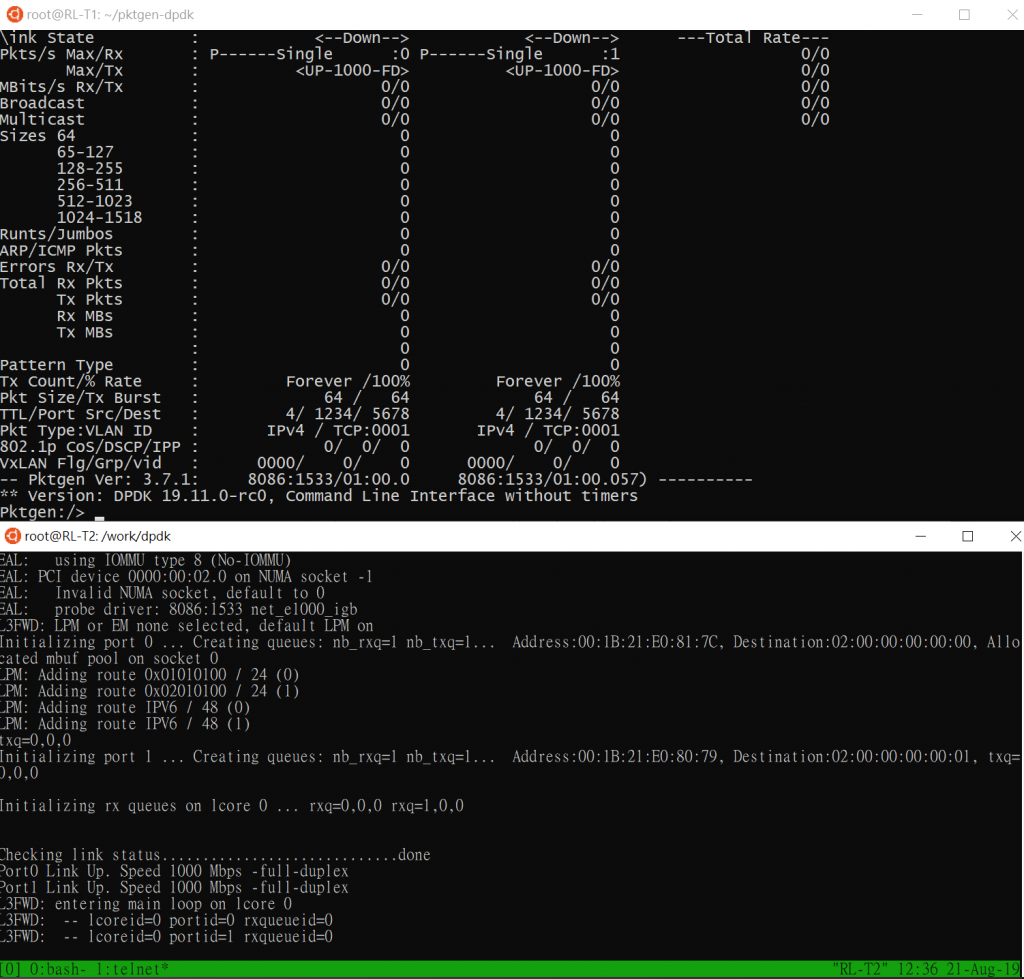
Before setup pktgen, it needs to get parameter from l3fwd. when run l3fwd, it will show those information on console. Here is information
Port 0 :
Mac Address : 00:1B:21:E0:81:7C
Network : 1.1.1.0/24
Port 1 :
Mac Address : 00:1B:21:E0:80:79
Network : 2.1.1.0/24
It needs to setup pktgent to follow this table, otherwise, l3fwd won’t forward packet to another port and will return packet back to original port.
Following is command to setup pktgen
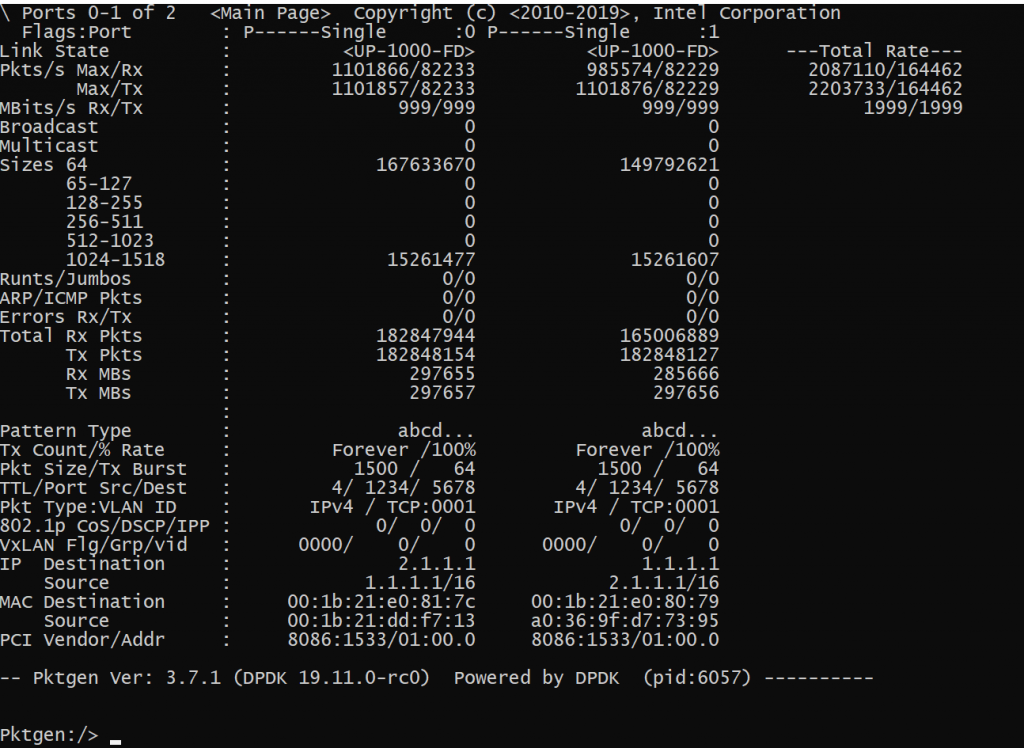
set 0 dst mac 00:1B:21:E0:81:7C
set 1 dst mac 00:1B:21:E0:80:79
set 0 src ip 1.1.1.1/16
set 0 dst ip 2.1.1.1
set 1 src ip 2.1.1.1/16
set 1 dst ip 1.1.1.1
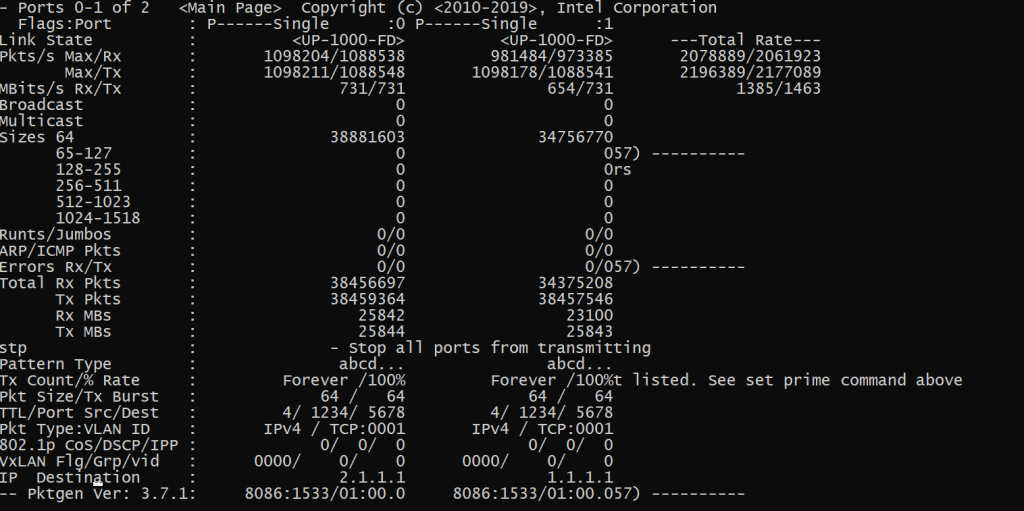
Start Packet Gen
start
It can also change packet size
set all size 1500
If not work, maybe use l2fwd to check whether has problem is a good idea.
Additional command can refer to Pktgen command line directory format
PKTGEN and Testpmd On the Same Machine
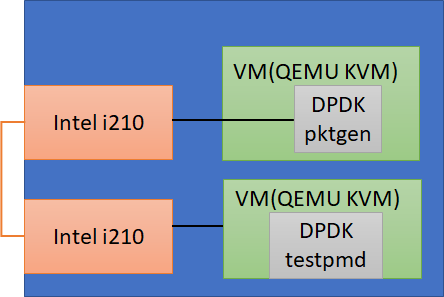
One machine only has two card, so, we replaced l3fwd with testpmd here. testpmd will return packet at the same port.
I don’t find good way to run pktgen and testpmd on one machine at the same time. only one dpdk application can run at once. Alternative solution is run pkgen and l3fwd on different VM.
So, you can prepare one VM image (please refer to previous article) first, after compile pktgen and dpdk successfully, shutdown VM and copy VM to another image, ex
cp bionic-server-cloudimg-arm64.img bionic-server-cloudimg-arm64-2.img
mv bionic-server-cloudimg-arm64.img bionic-server-cloudimg-arm64-1.img
Run two VM at the same time , but it needs to change netdev name, vm name, driver name and telnet server port.
Here is example script
IMAGE1=bionic-server-cloudimg-arm64-1.img
 sudo qemu-system-aarch64 -name vm1 \
         -machine virt,gic_version=3,accel=kvm,usb=off \
         -cpu host -m 8192 \
         -smp 12,sockets=1,cores=12,threads=1 \
         -nographic -nodefaults \
         -pflash flash0-1.img -pflash flash1-1.img \
         -device vfio-pci,host=0001:01:00.0 \
         -drive file=$IMAGE1,if=none,id=disk1 \
         -device virtio-blk-device,scsi=off,drive=disk1,id=virtio-disk1,bootindex=1 \
         -netdev tap,id=net0,ifname=tap0 \
         -device virtio-net-device,netdev=net0 \
         -mem-path /mnt/hugepages \
         -serial telnet::9001,server,nowait > guest1_log-1.txt 2>> guest1_log-1.txt &
 IMAGE2=bionic-server-cloudimg-arm64-2.img
 sudo qemu-system-aarch64 -name vm2 \
         -machine virt,gic_version=3,accel=kvm,usb=off \
         -cpu host -m 8192 \
         -smp 12,sockets=1,cores=12,threads=1 \
         -nographic -nodefaults \
         -pflash flash0-2.img -pflash flash1-2.img \
         -device vfio-pci,host=0002:01:00.0 \
         -drive file=$IMAGE2,if=none,id=disk2 \
         -device virtio-blk-device,scsi=off,drive=disk2,id=virtio-disk1,bootindex=1 \
         -netdev tap,id=net2,ifname=tap1 \
         -device virtio-net-device,netdev=net2 \
         -mem-path /mnt/hugepages \
         -serial telnet::9002,server,nowait > guest1_log-2.txt 2>> guest1_log-2.txt &
 sleep 5
 brctl addif virbr0 tap0
 brctl addif virbr0 tap1
inside vm, pktgen example command
cd /root/pktgen-dpdk
./app/build/app/pktgen -l 0-4 -n 3 -- -P -m "[1:3].0"
testpmd example command
testpmd -c f -n 4 -- -i
Multiqueue testpmd command
testpmd -l 1,2,3,4,5,6 -n 4 -- -i --rxq=2 --txq=2

發佈留言