

Chinese article version: 在 ARM64 QEMU System 上安裝 ARM64 Windows 11
Nowadays, ARM64 systems have become relatively mature, and recently, Windows 11 for ARM64 can also be installed on these systems. Naturally, there are people who want to run it on QEMU. However, most articles on this topic are not well-organized.
Here, let’s document the things what I discoverd and need to be prepared.
Preparations Hardware and Software
1) System: Ampere Altra CPU
Small ARM64 dev boards like RPI4 or RPI5 should also work, but installing on them might not be necessary, because it only has limitation CPU power and Memory. A more cost-effective solution is to use Apple Mx series CPUs [ref], as they are also ARM64, and many people purchase them for installing Linux.
2) ARM64 ISO Image
While there are numerous options available on internet, for a relatively legal acquisition of the ISO image, it is recommended to use Windows-11-On-Ampere
This step can be a bit complex, but the key is to use UUP Dump to fetch the Windows ISO and then use Rufus to burn it onto a USB Flash drive. During the burning process, Rufus can override some of the restrictions of Windows 11, such as TPM Support, which may not be fully supported on ARM64 CPUs.
3) Windows Virtio Driver
Download the Windows Virtio driver and place it into the USB Disk that was created in the previous step.
Here has download URL can download the Windows virtio driver : Proxmox Windows VirtIO Drivers, alternative download website: download the latest stable or download the most recent.
After downloading, extract the ISO contents and place them onto the USB Disk.
4) Convert USB Dump to Image
Linux users are likely familiar with this step.
dd if=/dev/sda of=/storage/Win11_ARM64_INSTALL.img
Why go through these steps? The primary reason is that within QEMU, it seems Windows cannot simultaneously configure two ISO devices. I encountered a freeze when attempting to install using the straightforward method. Hence, I went through this elaborate process to make it install smoothly.
5) virt-manager
Most examples available to others involve pure QEMU commands. However, this time, I wanted to avoid typing a bunch of commands and preferred a more user-friendly approach. Therefore, the examples provided here utilize virt-manager. Nonetheless, I believe the underlying logic is the same.
New Virtual Machine on QEMU
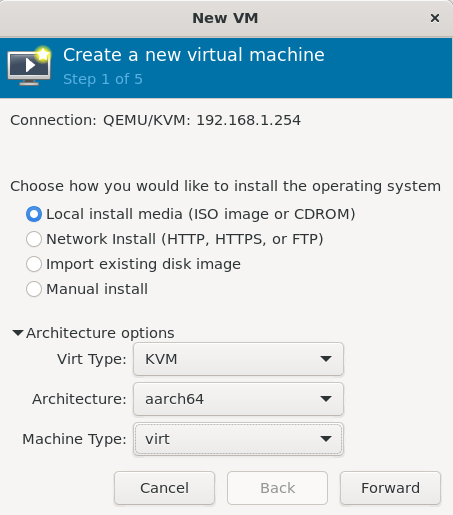
Virt Type: KVM
Architecutre: aarch64
Machine Type: virt
Next step, choice the ISO image we just created Win11_ARM64_INSTALL.img, Choose “the operaion system you are installing: Microsoft Windows 11”
For the CPU and memory, I used 16 cores and 16GB, which should be sufficient. A smaller combination might work, but I haven’t tested it because I’m too lazy to do so.
It’s recommended to set up the Disk Image manually, virt-manager tends to allocate the entire specified disk space right from the start, which may not be space-efficient. Windows 11, with its minimum space requirement of 52GB, can be allocated around 60GB or more based on your needs. Here is example command to pre-create qemu image.
qemu-img create -f qcow2 MyImage.qcow2 60G
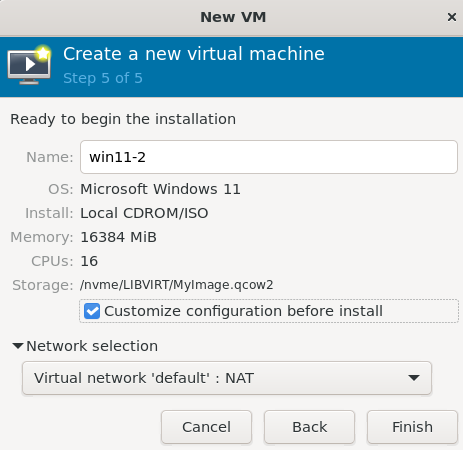
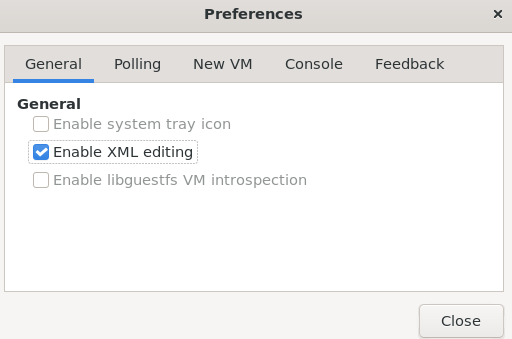
Before executing, choose “Customize configuration before install.” There are certain adjustments to make. Remember to enable the XML editing feature within virt-manager beforehand. Go to the main program, select Edit -> Preferences -> Enable XML editing, and ensure it is checked.
In the XML section related to CPUs, locate the segment pertaining to ‘hyperv,’ and modify it with the following settings:
    <hyperv mode="custom">
      <relaxed state="off"/>
      <vapic state="off"/>
      <spinlocks state="off"/>
    </hyperv>

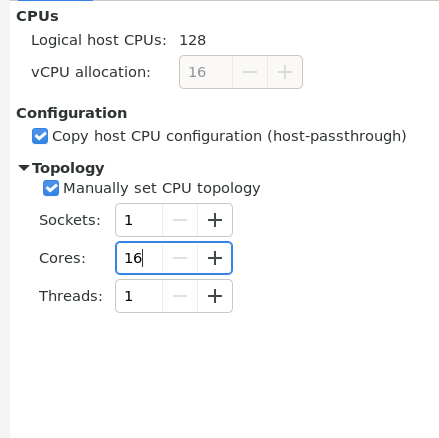
In the CPU section, change the quantity from ‘sockets’ to ‘cores.’ Below is an example for 16 cores:
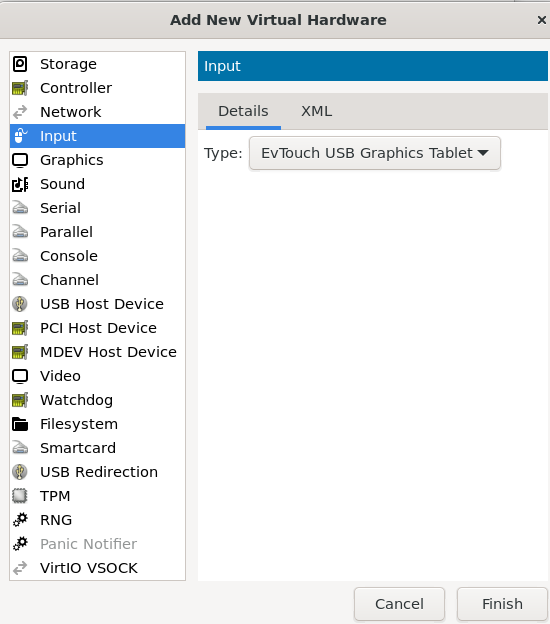
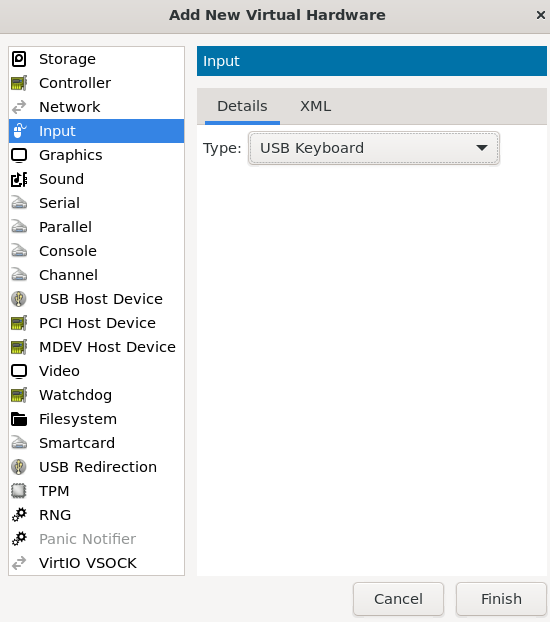
Add those hardware setting into current configuration:
Input -> USB Keyboard
Input -> EvTouch USB Graphics Tablet
Graphics -> Spice server
Video -> Ramfb
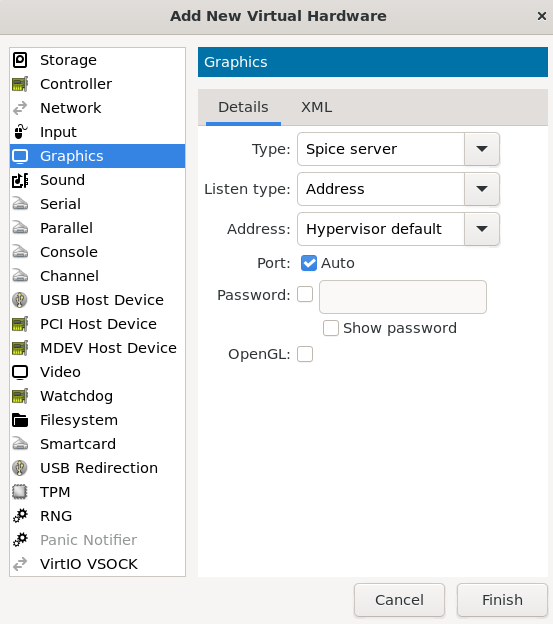
For the Video option, it is essential to choose Ramfb; otherwise, the graphics might not display properly. QXL or Virtio should not be used. Virtio-gpu-pci hasn’t been tested, but some suggest it might work[ref].
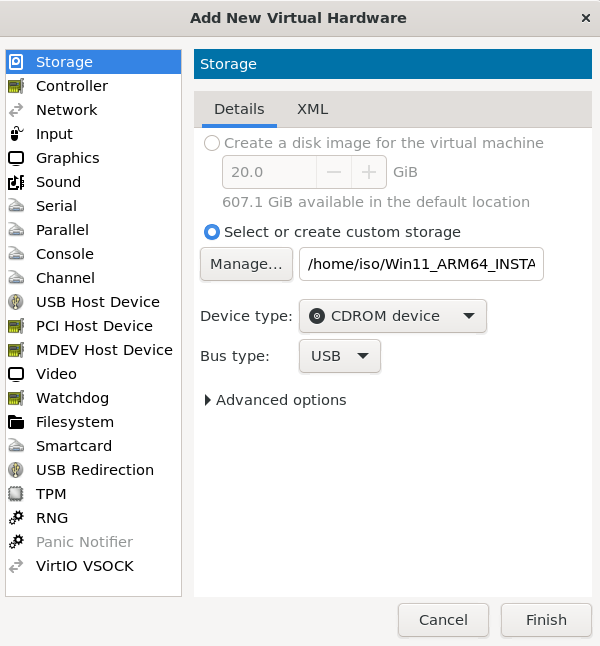
Lastly, in Storage, add a USB CDROM device and set it up with the Win11_ARM64_INSTALL.img file you created earlier.
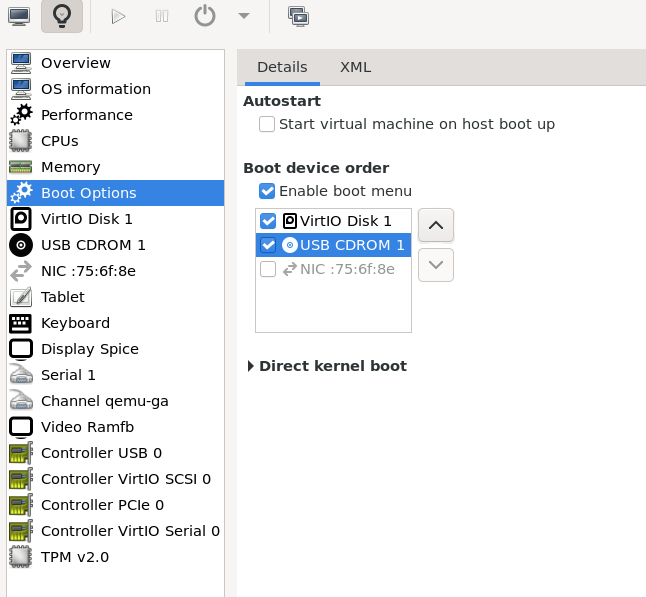
In the Boot Options section, enable the option for USB CDROM 1, and then you should be ready to boot.
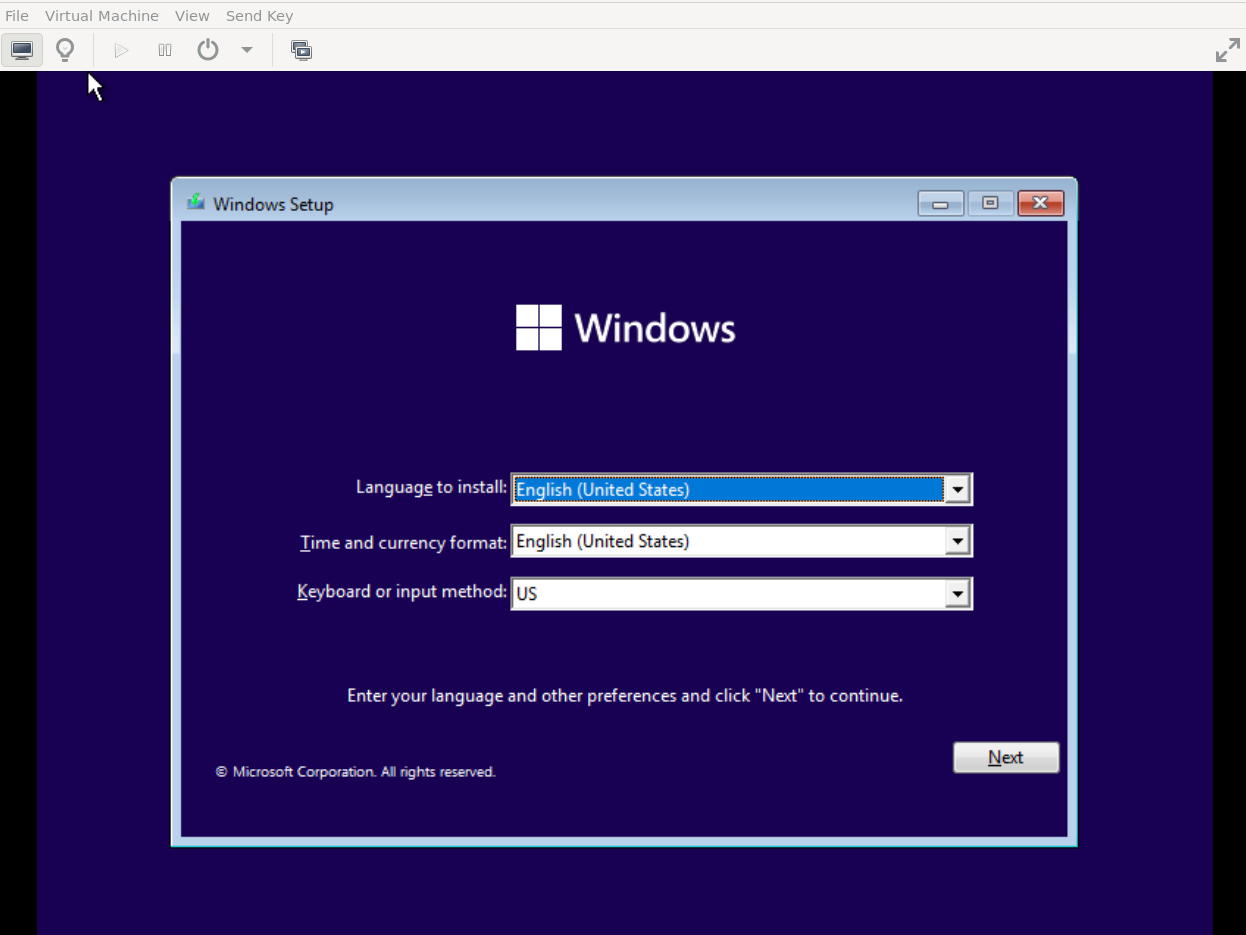
If the configuration is correct, you should be able to boot to this screen successfully.
If following the above steps results in a hang during the installation process, you can try adjusting the boot options by changing the boot order. Try setting “disk” first and “USB CD ROM” second.
Install Windows
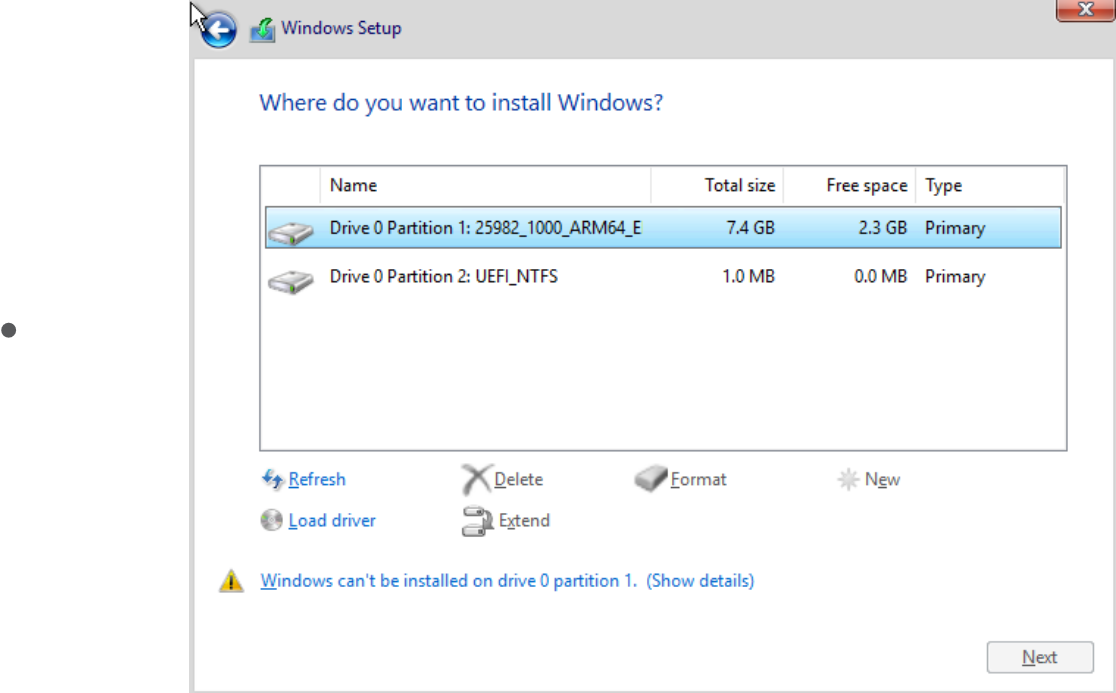
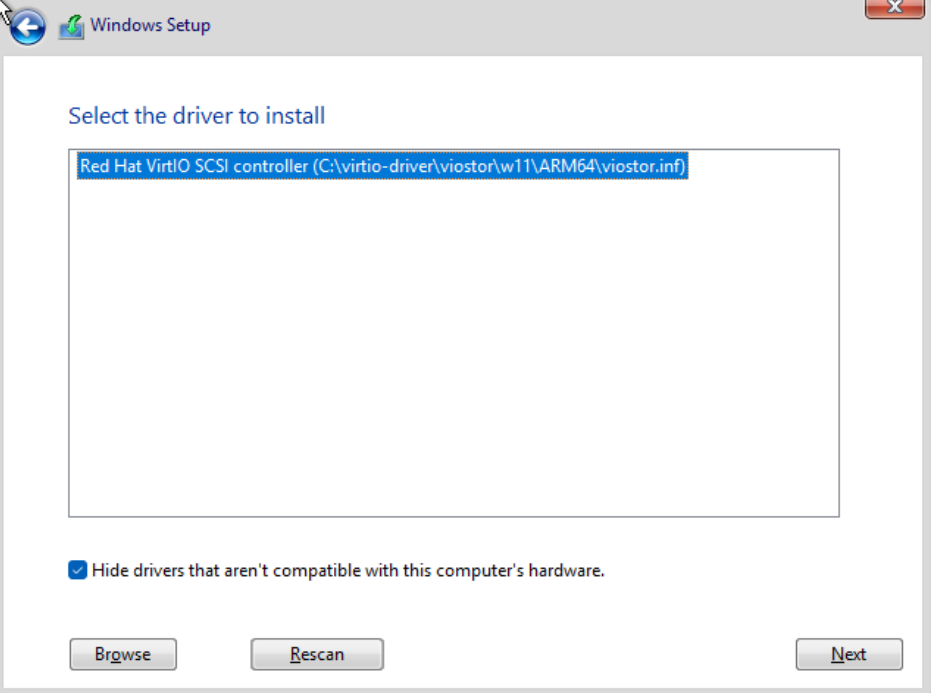
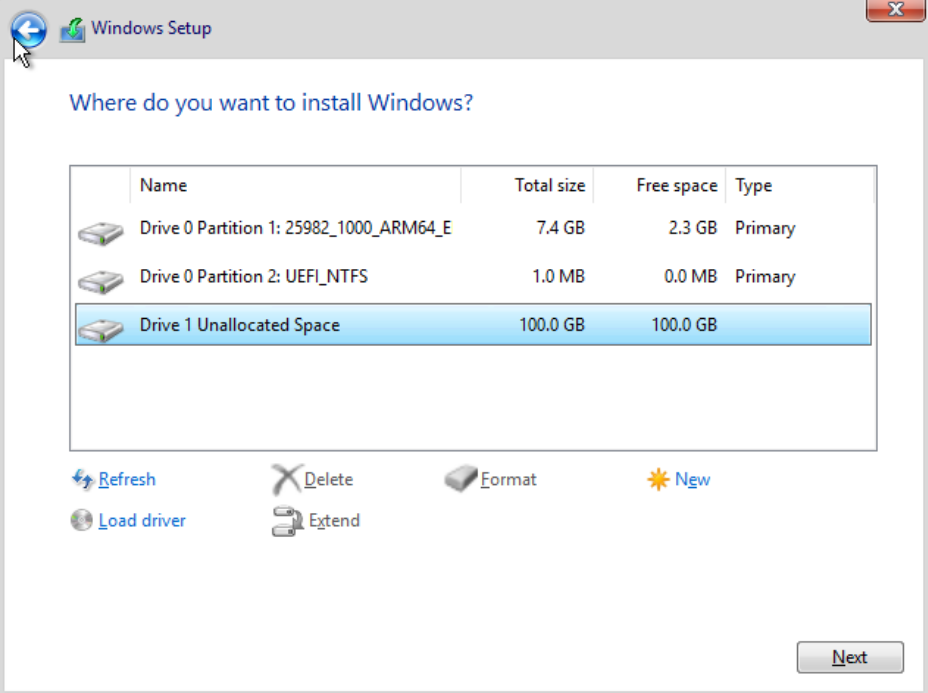
Under normal circumstances, Windows might not detect the disk. In such cases, select “Load driver” -> “25982_1000_ARM64_EN-US(C:)” -> “Virtio-driver” -> “viostor” -> “win11” -> “ARM64” (Note: The labels and directories here may vary based on different configurations).

In the final step, for the NIC driver, when prompted to connect to the network upon the initial entry into Windows 11, select “Install driver” -> “25982_1000_ARM64_EN-US(D:)” -> “Virtio-driver” -> “NetKVM” -> “win11” -> “ARM64”.
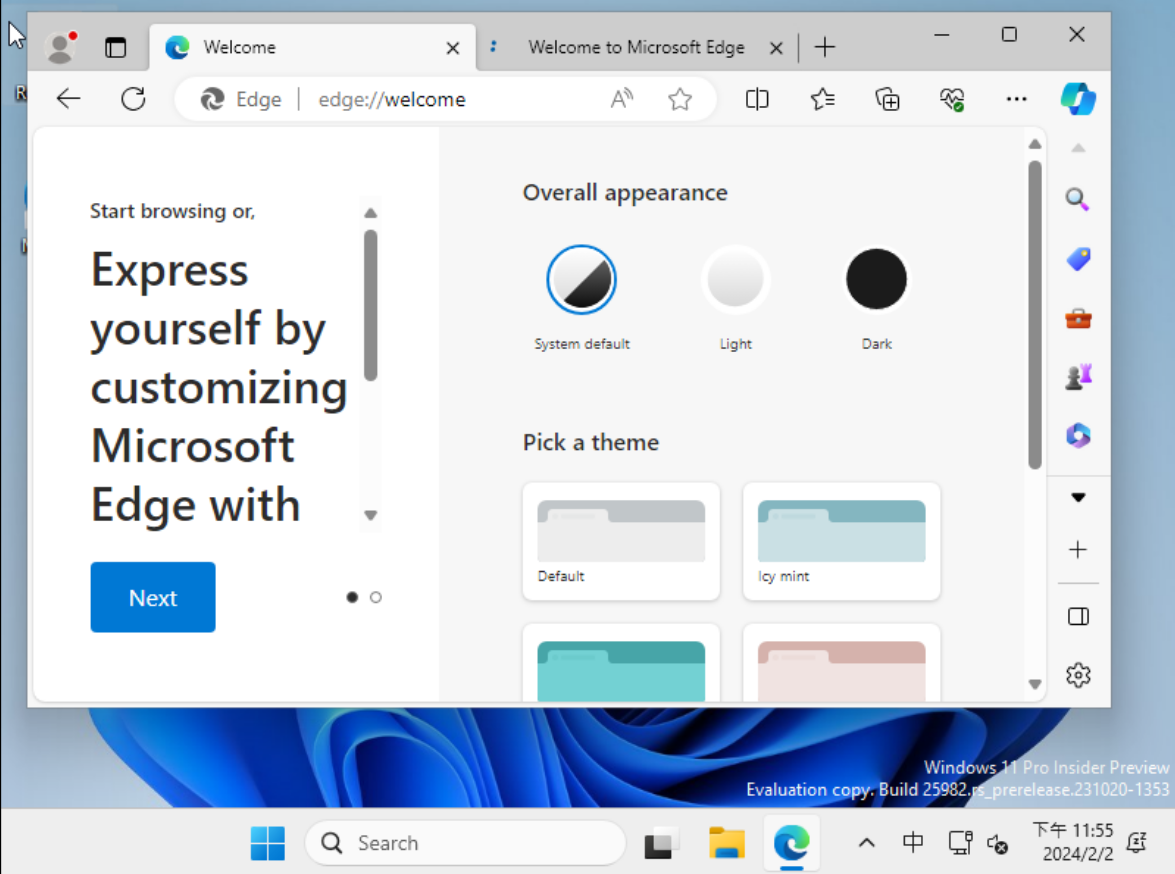
With this, you should have successfully completed the installation of Windows 11.


Happy Playing Windows 11 on ARM64 Qemu

發佈留言