
Chinese version Article is here (Ampere Altra/AltraMax 加AsRock ALTRAD8UD-1L2T 水冷方案)
2024/01/31 Update: Ampere will have 2U passive cooler Making Arm Desktops Viable Ampere Altra Noctua NH-D9 AMP-4926 4U and NH-U14S AMP-4926
The Ampere Altra/AltraMax CPU features a maximum of 128 ARM64 cores, typically found in cloud server. However, cloud server Care not suitable for placement in offices or homes due to the high-speed fans used for heat dissipation. The noise generated by these fans is generally intolerable for regular users. Additionally, adapting server motherboards to standard consumer motherboards is inconvenient. If there is a desire to utilize such a CPU in a different setting, the ADLink Ampere Altra Dev Platform presents a viable solution, complete with the option for liquid cooling.
Another solution is the AsRock ALTRAD8UD-1L2T, currently available on Newegg. Paired with an Ampere Altra Q64-22 CPU (64 cores, 2.2GHz), it comes with a complimentary 2U passive heatsink, priced at US$1,500, which can be considered affordable. However, it’s worth noting that the included heatsink is passive. If you prefer liquid cooling over installing a fan on the passive heatsink, then this article is the right guide for you.
The author have adding a declaration at the beginning of articles that may pose potential risks:
- This article is not an official endorsement by Ampere, Newegg, or any other mentioned merchants or vendors. It is solely a personal record.
- The author has a business relationship related to the production of the mentioned motherboard.
- The author is a first-time to use liquid cooling computer system , and the content may not be entirely accurate. Please be aware of potential risks.
- This article is not an official document from Ampere or AsRock.
- The original article is in Chinese, and the English translation is done using machine translation. Please forgive any inaccuracies in wording.
- I am not responsible for any consequences resulting from this article; for example, losses incurred due to improper implementation of instructions provided in this article.
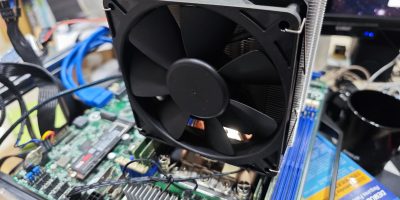
The Ampere system primarily focuses on Cloud-native CPUs, and as of now, there is no manufacturer producing general-purpose cooling systems for it. The included 2U passive heatsink in this system is designed for server use, utilizing high-speed server fans for heat dissipation. While the Q64-22 included by Newegg has lower power consumption, its only cooling method involves direct airflow from an electric fan. Alternatively, users may resort to attaching an 8-inch fan onto it. Such cooling solutions are deemed unacceptable for enthusiasts and professionals like myself.
If you intend to upgrade the cooling system, typical tower-type coolers require replacing the fixture on the back of the motherboard. Moreover, compatibility with the fastening mechanisms of this specific motherboard can be challenging to find. Considering that only front-facing screws can be used, the only viable cooling solution is a liquid cooling system. Therefore, I have been experimenting with a liquid cooling solution that works for this scenario. I’m sharing this information for those adventurous individuals who might encounter similar challenges, and perhaps this approach can inspire some creative solutions.
In the upcoming sections of this article, I will guide you on how to set up a liquid cooling system specifically tailored for the Ampere Altra on the ALTRAD8UD-1L2T motherboard. In theory, since the screw hole positions are the same, this method should be applicable to other Ampere motherboards as well. However, the focus of this content will primarily be on the ALTRAD8UD-1L2T. The article will also cover any pitfalls encountered during assembly and the items needed for the setup(Chinese website).
Preparation
ALTRAD8UD-1L2T
You can find the specifications for this motherboard online, and I won’t repeat them here. However, what might confuse some people is the term “Deep mATX.” This is a specification unique to AsRock, where they increase the depth dimension of the mATX form factor while maintaining the standard width. The purpose is to provide more space to accommodate additional components. This particular specification is commonly seen in AsRock’s server-grade motherboards.
Chassis
Generally, most computer cases should work. However, I made a mistake on my end by choosing a case that was too small. The case I purchased is the Antec P110 Silent. While it has liquid cooling mounting points, it is not suitable for adding a liquid cooling system. The internal space is too limited, lacking a designated area for securing the water pump. Additionally, the Antec P110 liquid cooling radiator cannot be placed at the top as it interferes with the motherboard. Consequently, the radiator had to be positioned at the front of the case.
When making a purchase, it’s crucial to choose a case that is suitable for water cooling. In more extreme cases, considering a caseless system might be an option (hopefully, this can be updated in the next release).
Cases designed for liquid cooling systems typically have more significant internal space to accommodate a water pump, and there is ample room for fans without obstruction. Some all-in-one water cooling designs may be more compact and might not encounter this issue.
Liquid Cooling System
Liquid cooling systems have some considerations to take into account:
- Tubing type: Choose between soft or hard tubing. Hard tubing is suitable for experienced users, offering a longer lifespan and a more aesthetic appearance. Soft tubing is easier for assembly, making it suitable for beginners.
- All-in-one (AIO) or custom loop: Decide whether to go for a pre-assembled AIO liquid cooling system or build a custom loop system.
Since the initial focus was on researching liquid cooling, the combination chosen was a custom loop with soft tubing. Building a custom loop may encounter some issues, with one of the main challenges being the uncertainty about specifications.
The first crucial aspect is determining the size of the liquid cooling tubing, as additional components will depend on this size, limiting the options for procurement. Currently, the mainstream sizes are two-eighths (2/8’), three-eighths (3/8’), and four-eighths (4/8’) liquid cooling tubing.
Another parameter is the thickness of the tubing, thick tubing and thin tubing.
* thick tubing refer to 10/16mm or 3/8”-5/8” tubing.
* thin thbing refer to 10/13mm or 3/8”-1/2″ tubing.
Most common the inner diameter specification is G 1/4, when find some liquid colling componens like pressure relief valve needs it.
Once you’ve confirmed your inner and outer diameter, you can proceed to purchase the necessary liquid cooling components.
At a minimum, you’ll need:
- CPU water block *1
- Water Pump *1
- 240mm radiator *1
- 12cm fans *2
- Liquid coolant 500cc ~ 1000cc
- Tubing 2M
- Thermal paste
- Pressure relief valve
- Fittings: Quick connectors *6, 90-degree rotary fittings *(1~2)
- Tools for filling and draining: Filling tool, draining tool (watering can, large syringe, drainage hose)
Optional components:
- Flow meter, temperature gauge (note: buying these requires purchasing two additional quick connectors).
In practical testing, if focusing solely on CPU cooling, it appears that a 240mm radiator is sufficient. The thin three-eighths (3/8”) tubing provides a large enough water flow diameter. Choosing a smaller tube diameter may not be as suitable for this purpose.
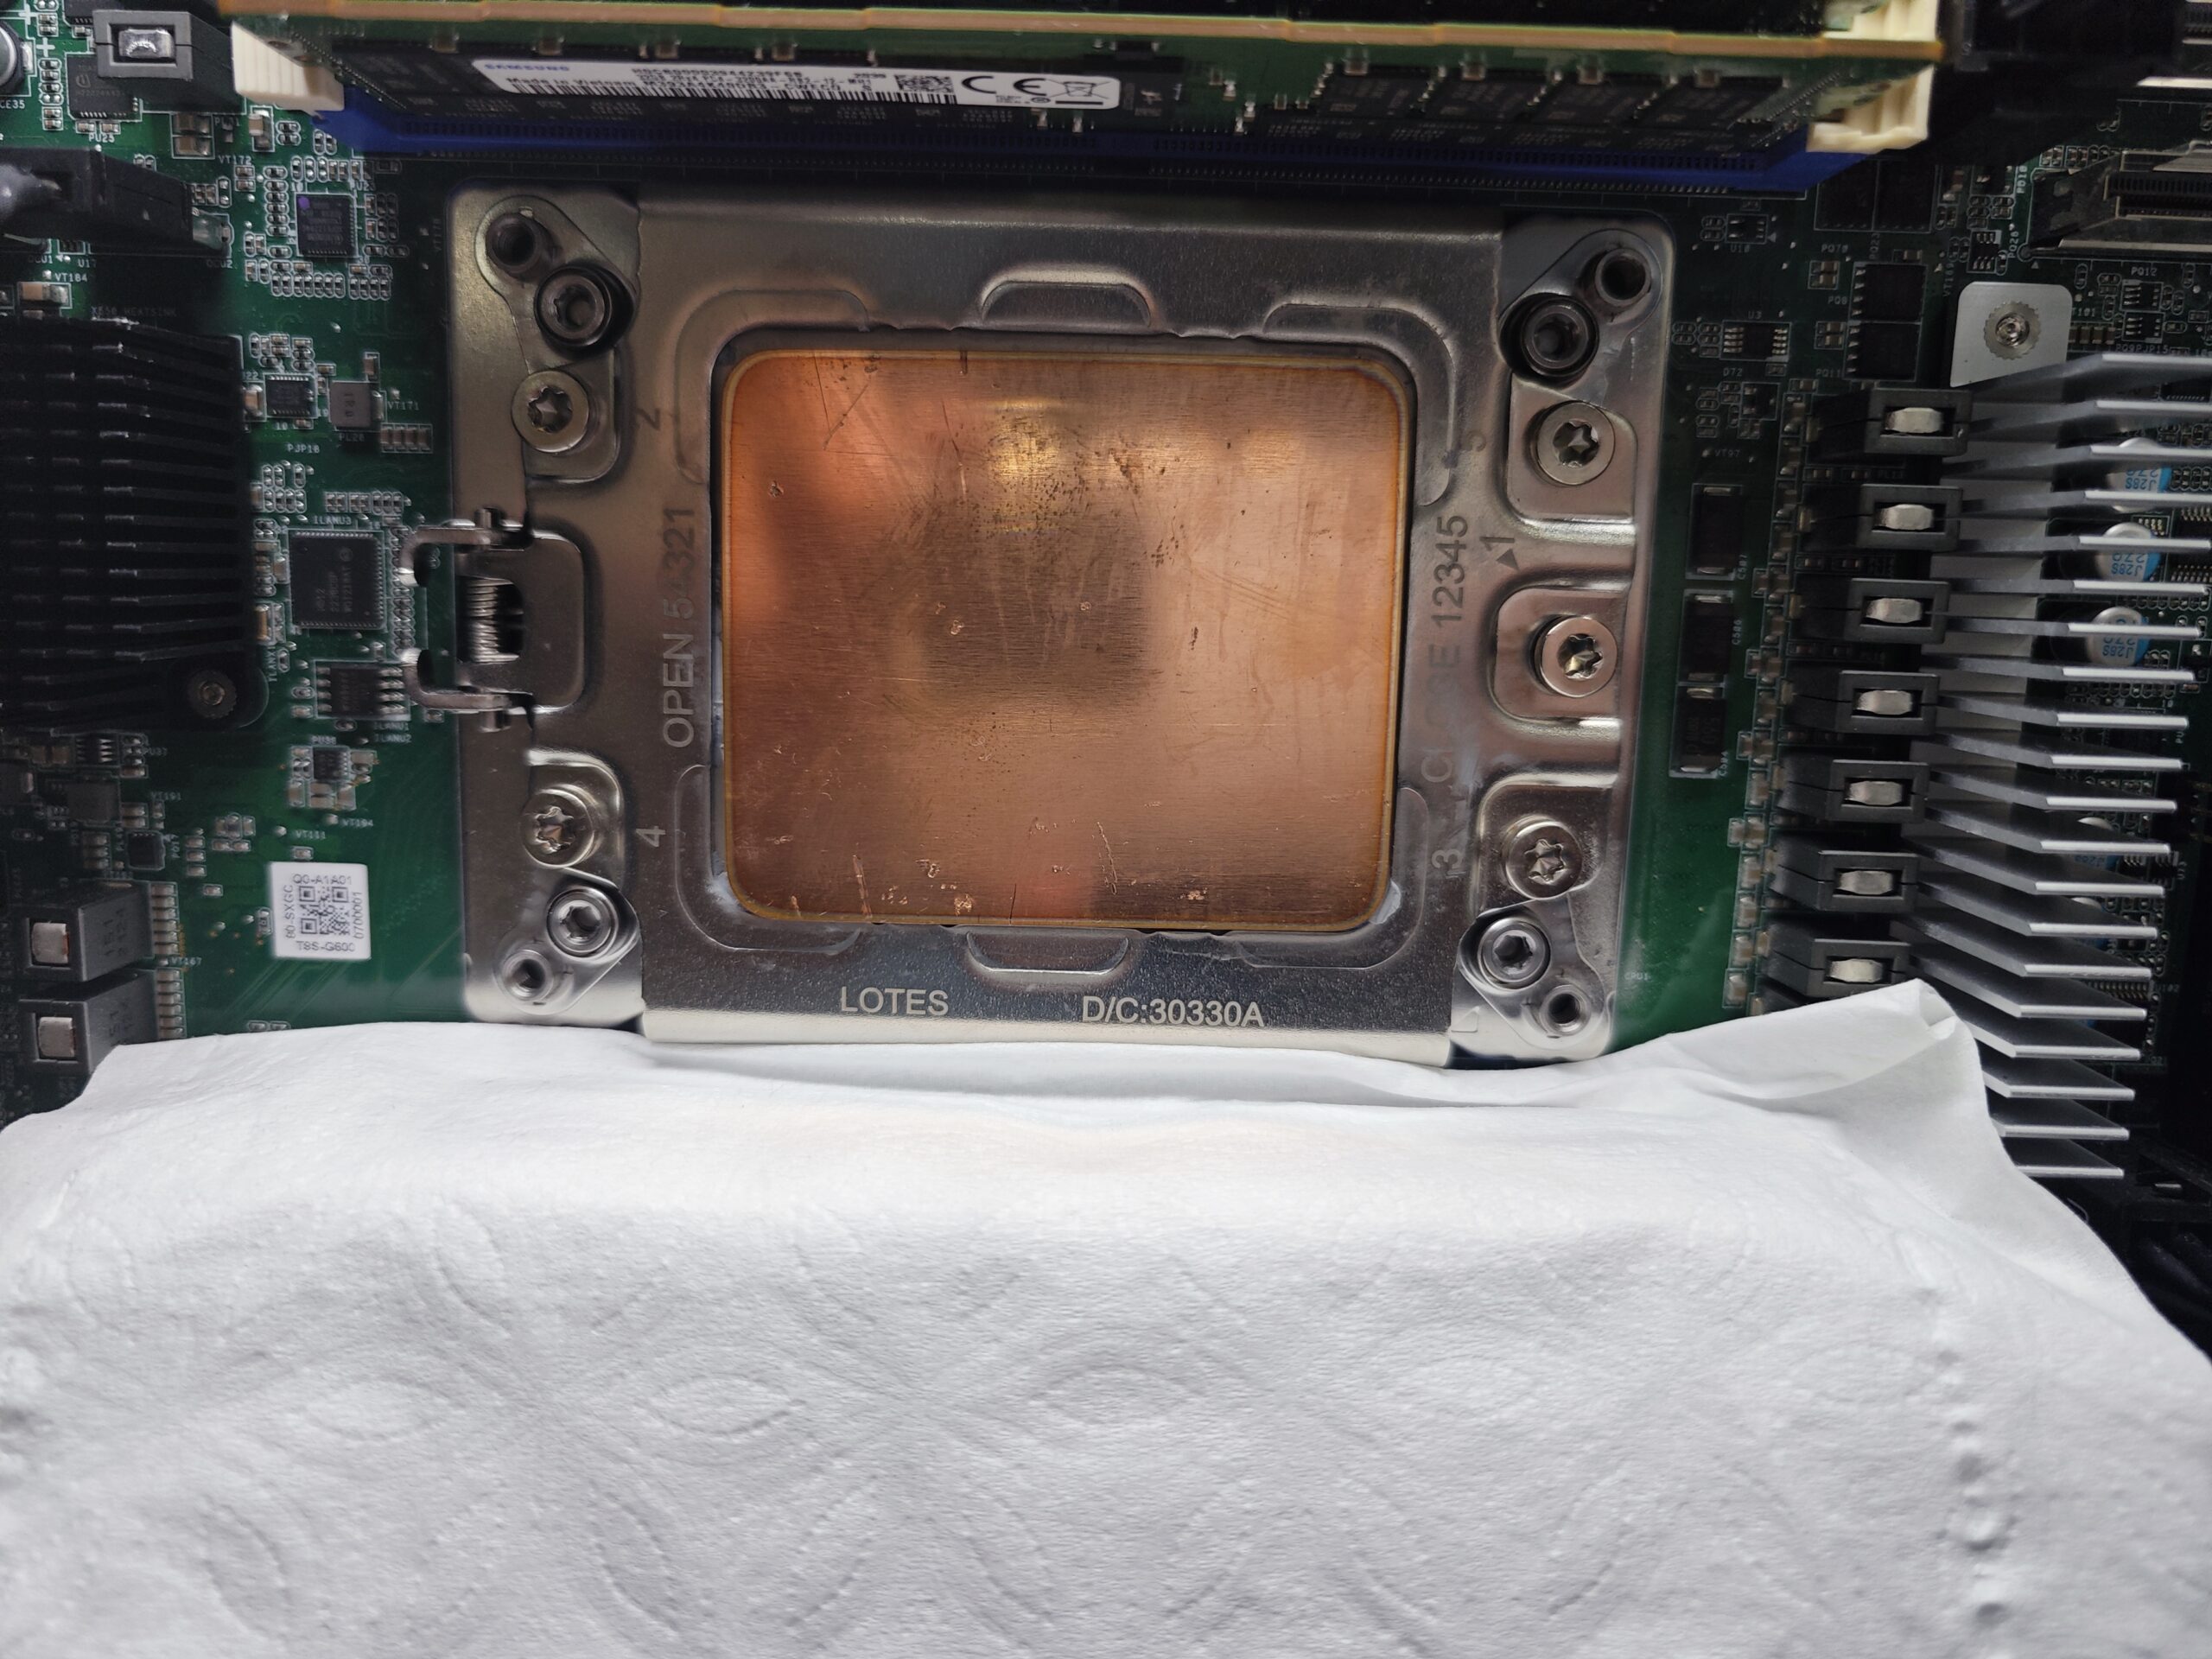
CPU water block
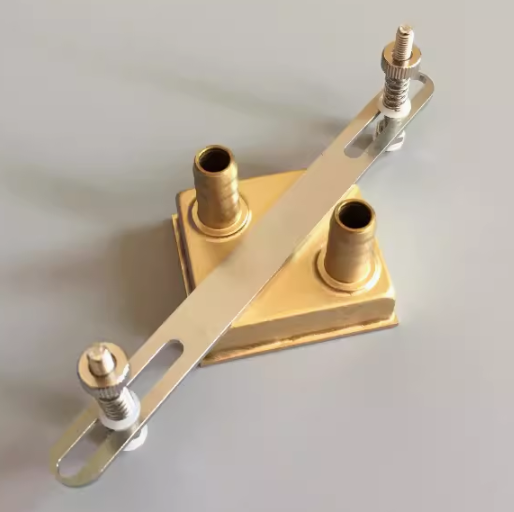
This turned out to be quite troublesome. My original plan was to purchase a 50mmx50mm heatsink and connect it to the heatsink on the right. Then, I intended to secure it to the CPU socket using the fixtures shown in the image. However, as expected, unexpected issues arose – the world isn’t always that kind.
- There was no water block with a 50mmx50mm connector available. So, I ended up buying a 40mmx40mm connector, one size smaller. This resulted in poorer heat dissipation performance. Fortunately, I never had the chance to test the inferior heat dissipation, so this step failed unnoticed.
- Here’s where I made a mistake. Custom water block connectors, like the one shown, are typically 2/8″ fittings. However, the main liquid cooling system I bought has 3/8″ fittings, making them completely incompatible. The options were either to change the fittings or change the entire system. Changing the fittings was the more cost-effective choice, so I opted for that.
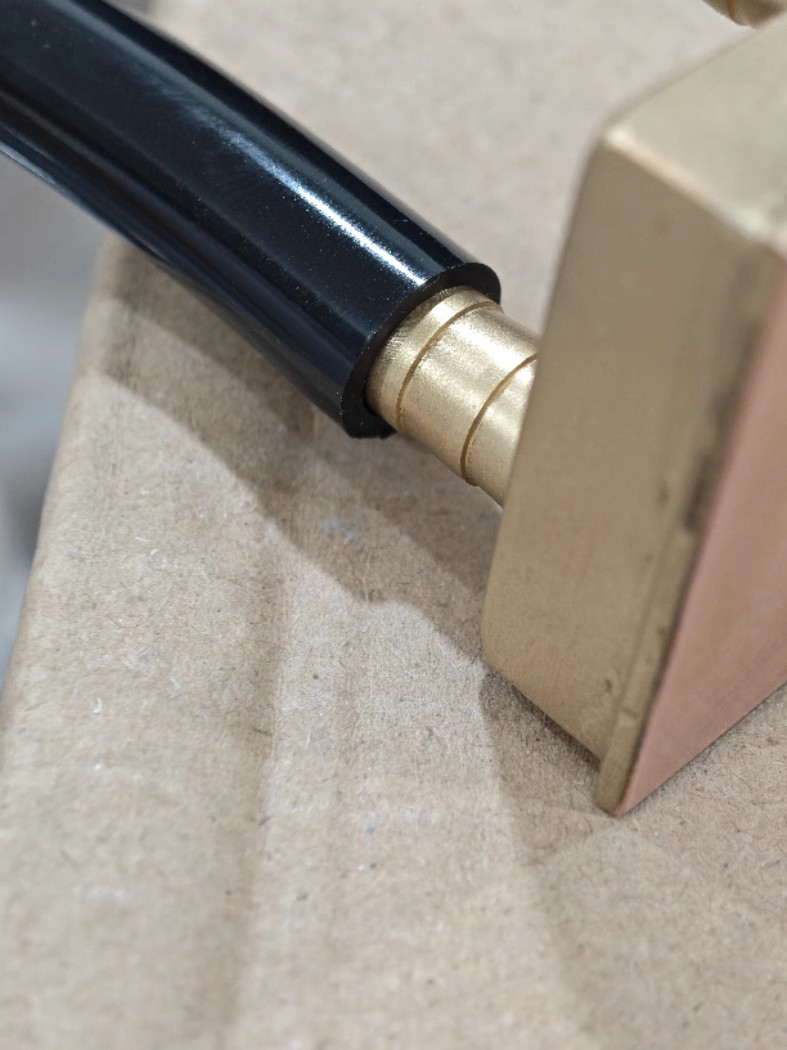
After connecting , it looked like the image on the right – and just looking at it made me worry that water would leak out.
So, I bought a two-eighths(2/8″) tubing to connect to this connector. However, while it could connect, it couldn’t link up with my three-eighths(3/8″) tubing in the water cooling system. I had to reluctantly abandon the custom water block connector.
The final solution had nothing to do with this connector.
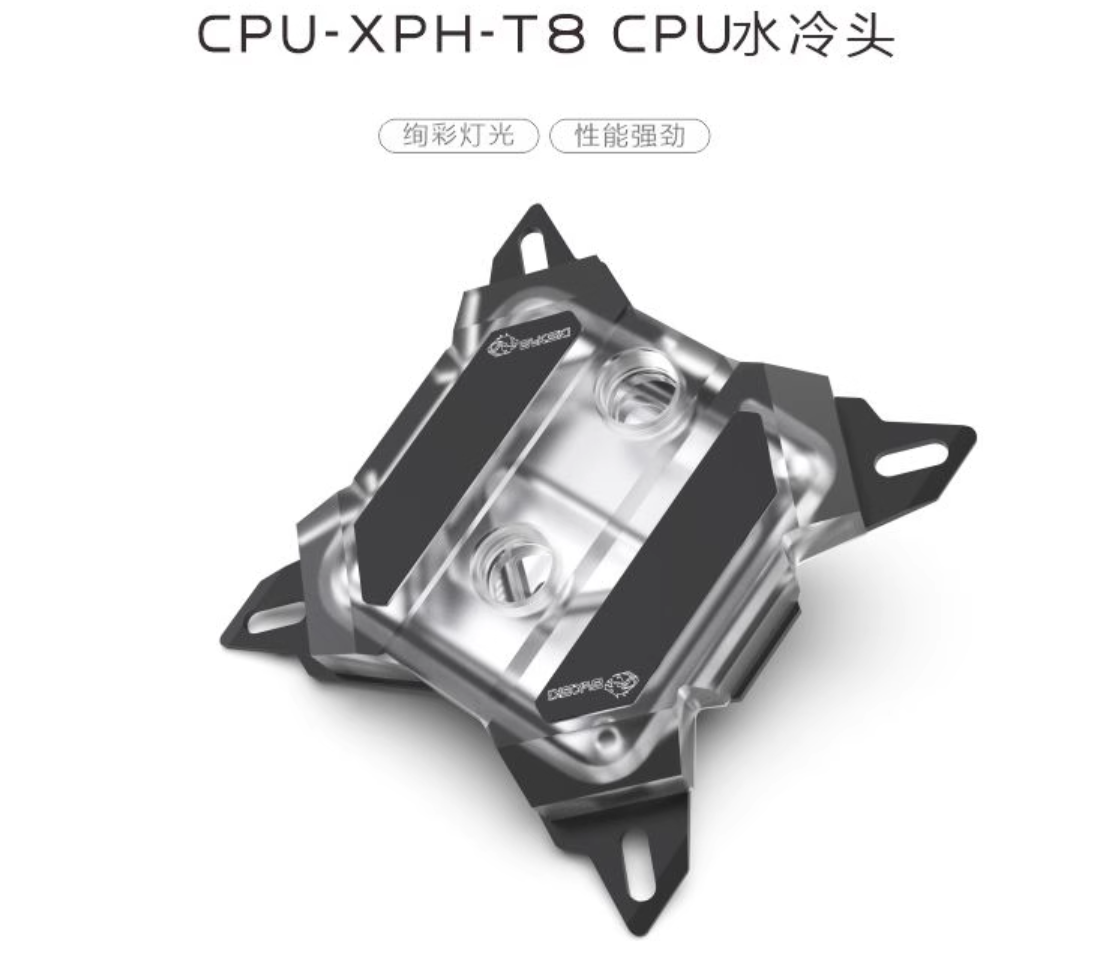
Communical CPU water block
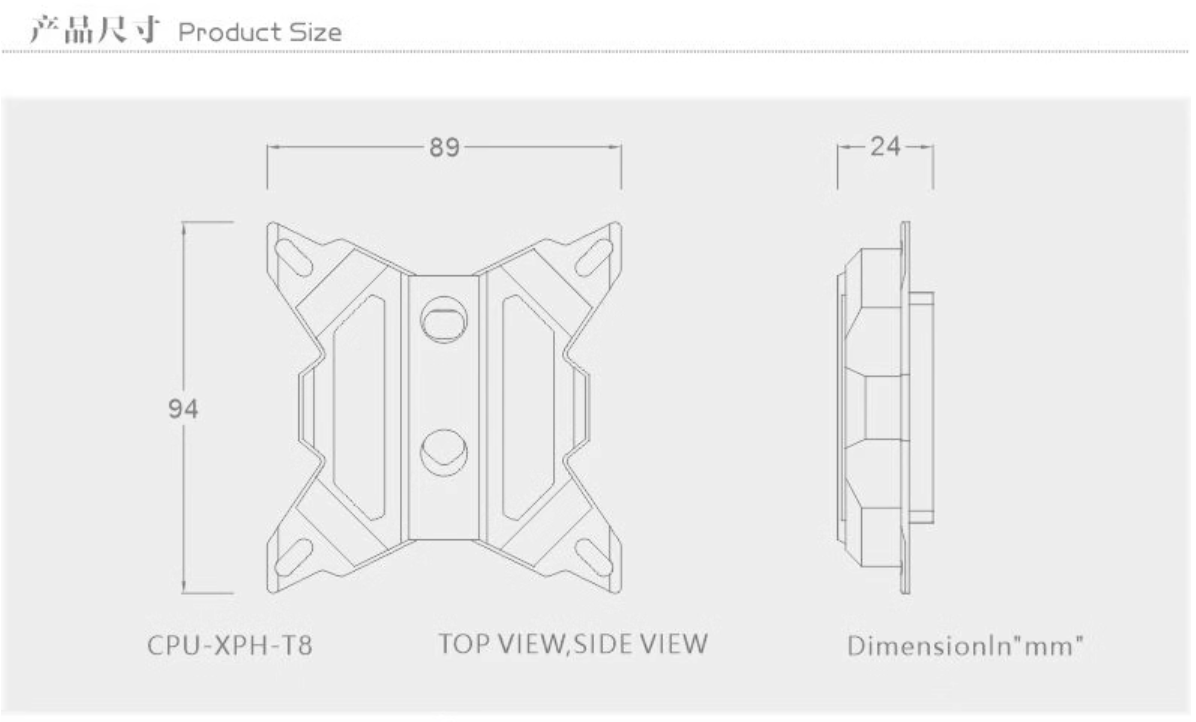
During the installation, I discovered that the Bykski CPU-XPH-T8 CPU water block, along with the provided adapter bracket, could be securely attached to the Ampere Altra’s socket. This was fantastic news and saved me a great deal of effort.
Although it’s designed for Intel LGA1700/LGA2066 sockets, the flexibility in its hole configuration allowed for adjustments, providing me with the necessary adaptability. As for whether other CPU brackets might be compatible, it’s likely that some could work. However, I haven’t had the chance to try others yet. If you have attempted this and found success, please let me know.
The base of this water block is quite substantial, and my intuition tells me that the cooling performance should be excellent. Therefore, I didn’t explore other compliant CPU water blocks.
However, another issue arises. The water block is 56mmx56mm, whereas the width of the Ampere Altra CPU socket is 55mm. The water block does not fit. At this point, there are two possible solutions:
Upon observing the CPU’s structure, the first solution seemed unfeasible. Cutting down the thickness of this water block would compromise its structural integrity, not to mention finding the tools or a professional service for the task.
Thus, the only viable option is the second solution. The simplest and most intuitive way to implement this is by using a thermal pad made of silicone to transfer heat upwards from the CPU.
Silicone Thermal Pad
But things couldn’t be as simple as I, a fool, initially thought. In conclusion, regular silicone thermal pads are not suitable for power monsters like the Ampere Altra. This type of thermal pad may be effective for low-power devices such as routers, switches, NVMe disks, etc., but it’s not useful for high-power CPUs.
In the image, there are 2mm thick silicone thermal pads, and you need two layers because the height is just that much. Essentially, this provides only a slight improvement over having no heat dissipation at all, so it’s not worth considering.
As for the high-efficiency silicone thermal pads available in the market, I don’t know if they would work. If you have them on hand, you can give them a try. However, I believe the chances of success are quite low.
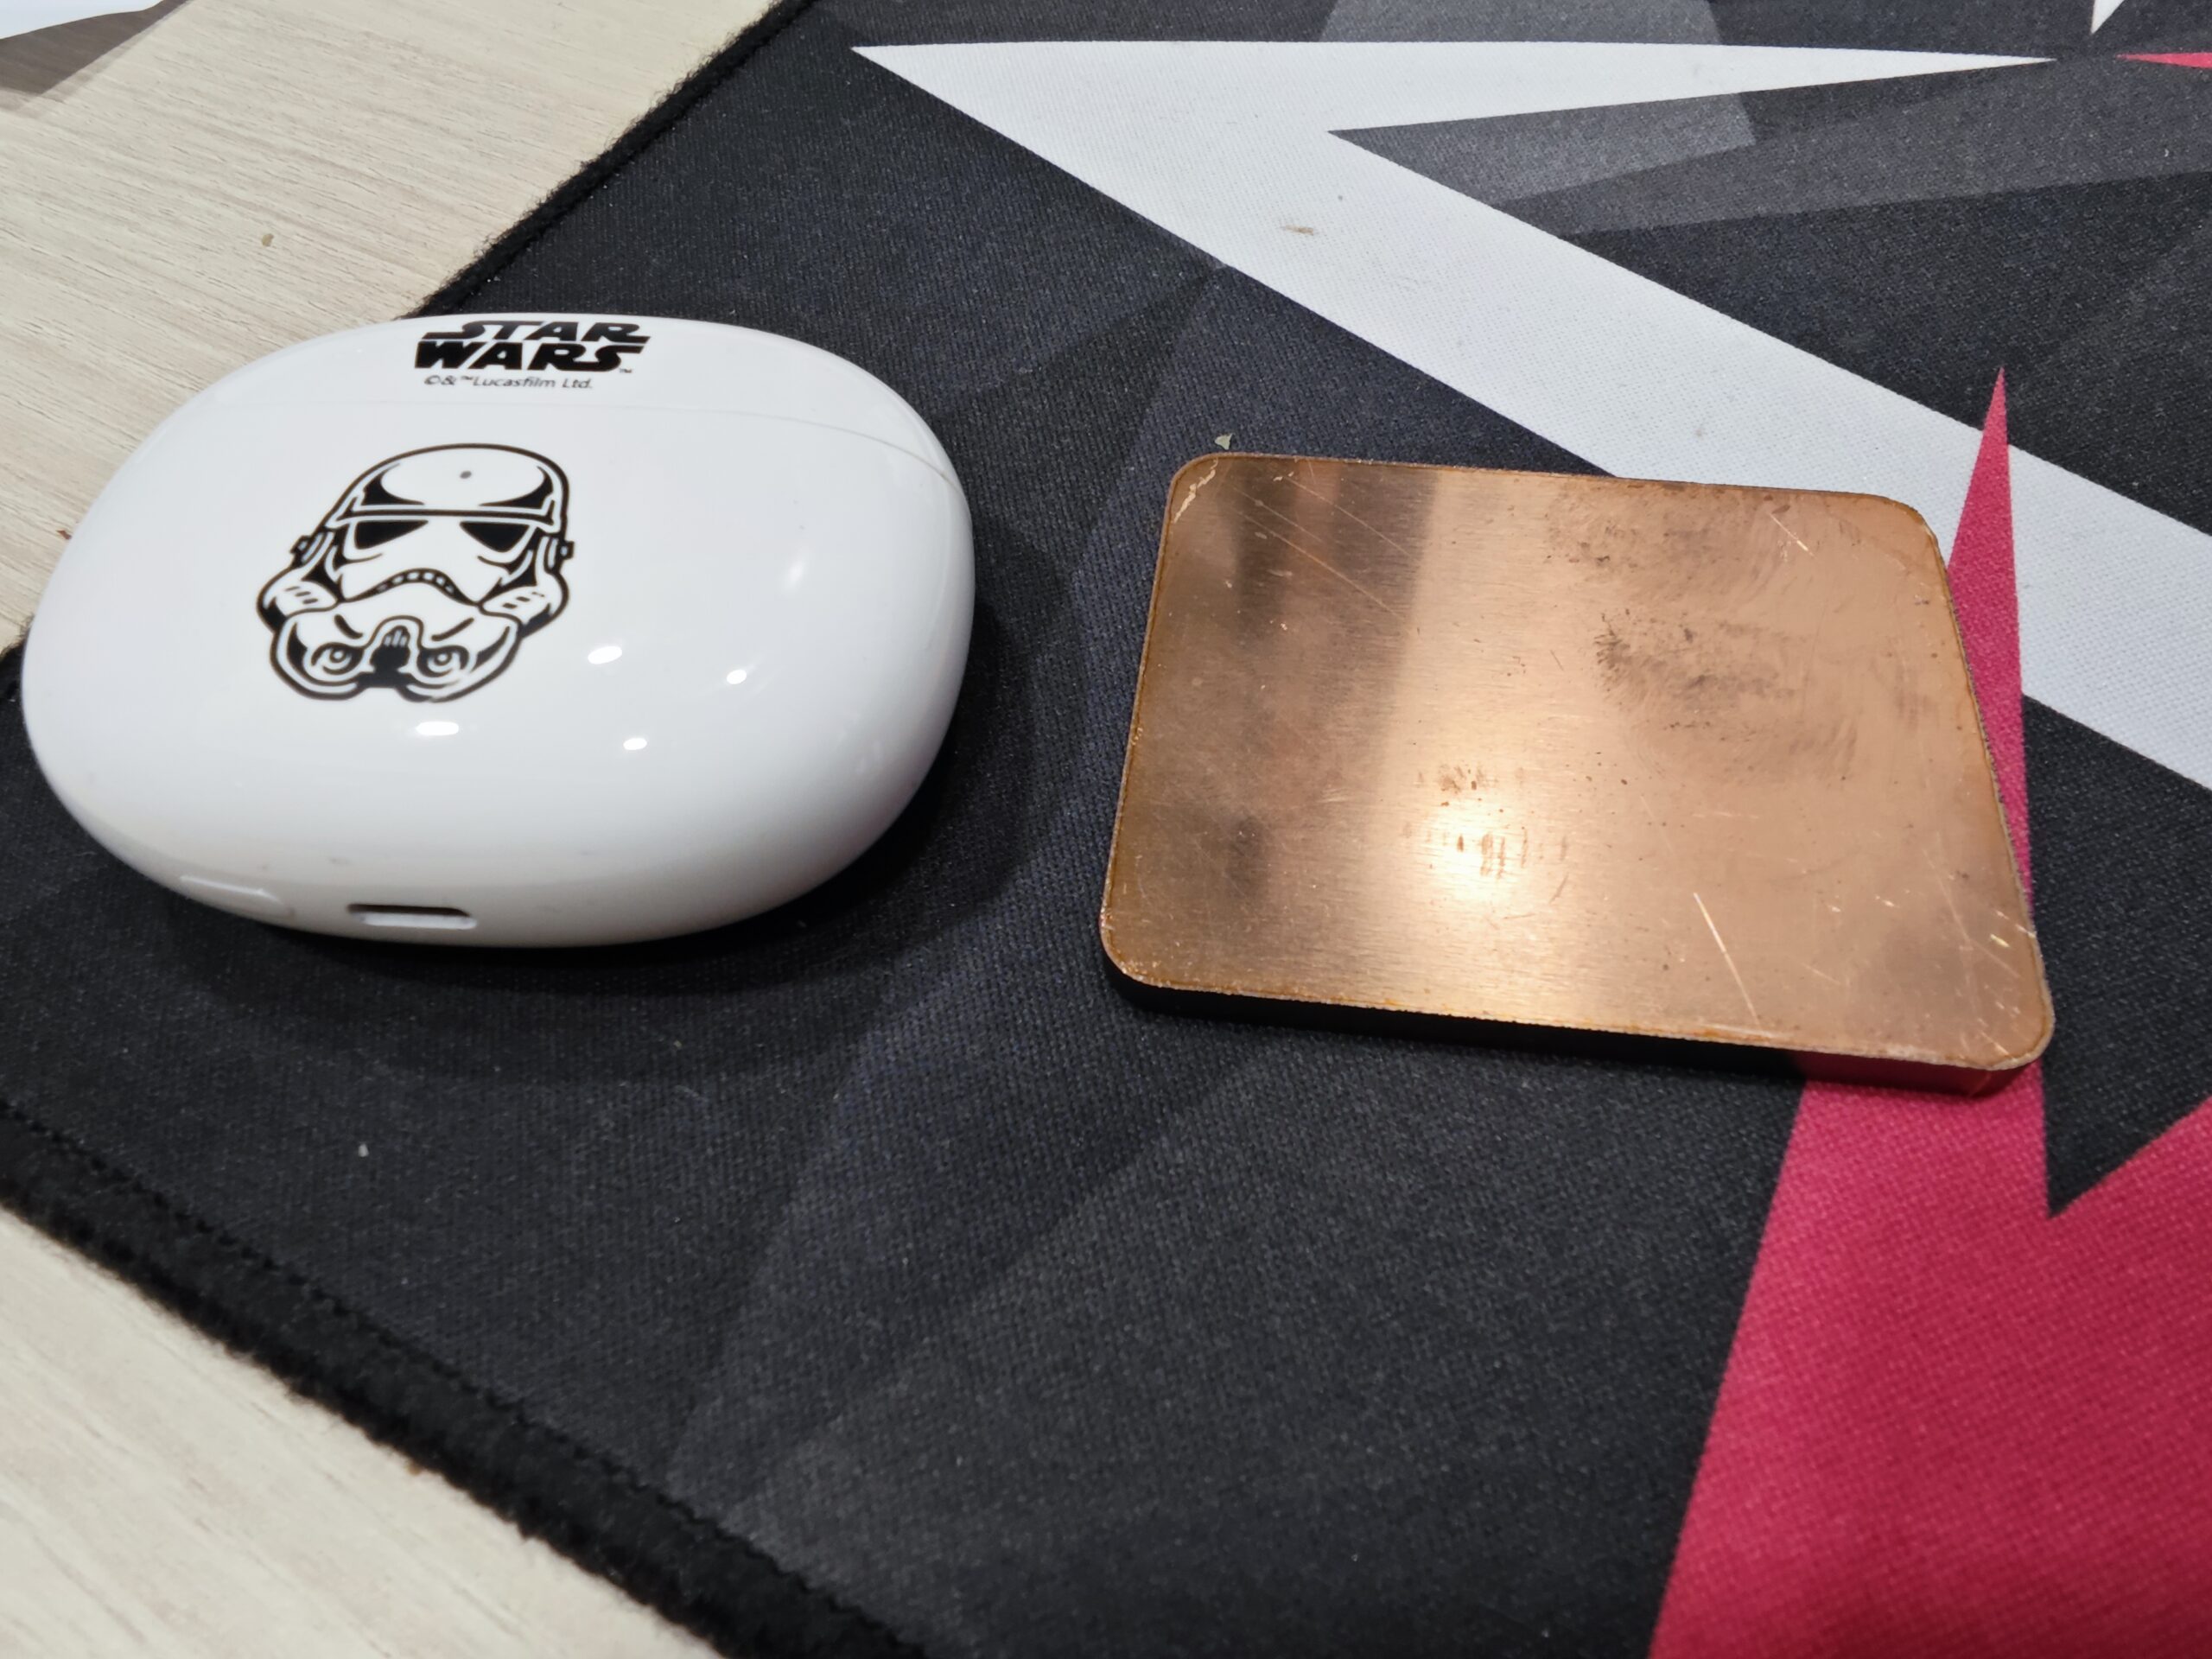
Purple Copper Thermal Pad
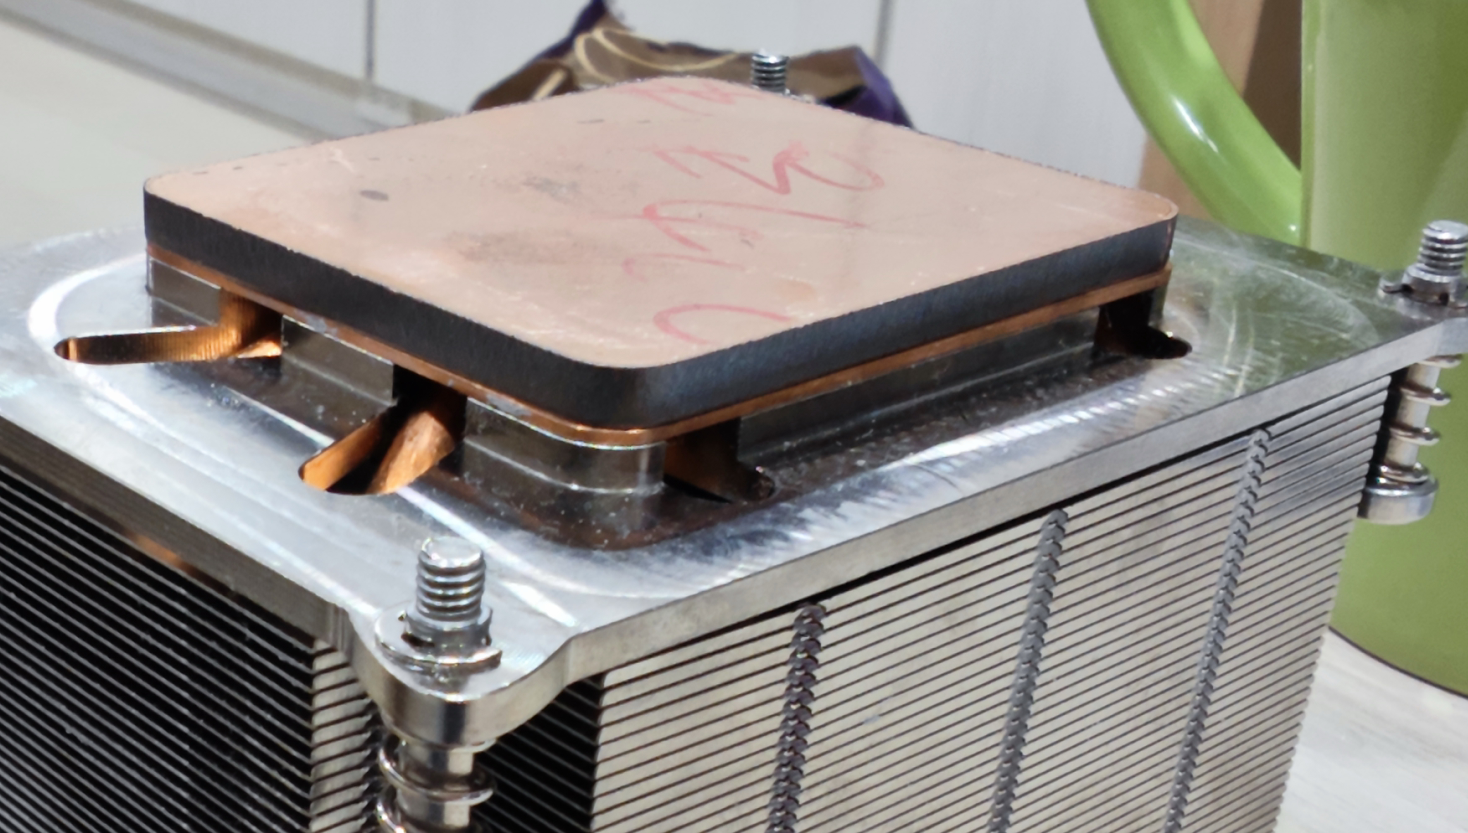
Nowadays, a common method for cooling is using purple copper heat pipes. This type of heat dissipation is quite effective, and the 2U passive heatsink included with Newegg utilizes these heat pipes. Therefore, if we can customize the heatsink, wouldn’t that solve the problem? Luckily, the country right next to my country is the world’s largest manufacturing factory, capable of customizing just about anything. This made the solution very affordable and instantly resolved my problem.
The dimensions of the purple copper thermal pad are: Length x Width x Height = 64x54x4mm, with a rounded R5 edge.
Alternatively, you can measure the dimensions of the piece under the 2U passive heatsink to get the specifications. Placing it on the original heatsink, I can say the dimensions match perfectly. The craftsmanship is quite impressive, and there are no issues when it’s actually placed.
Assembly
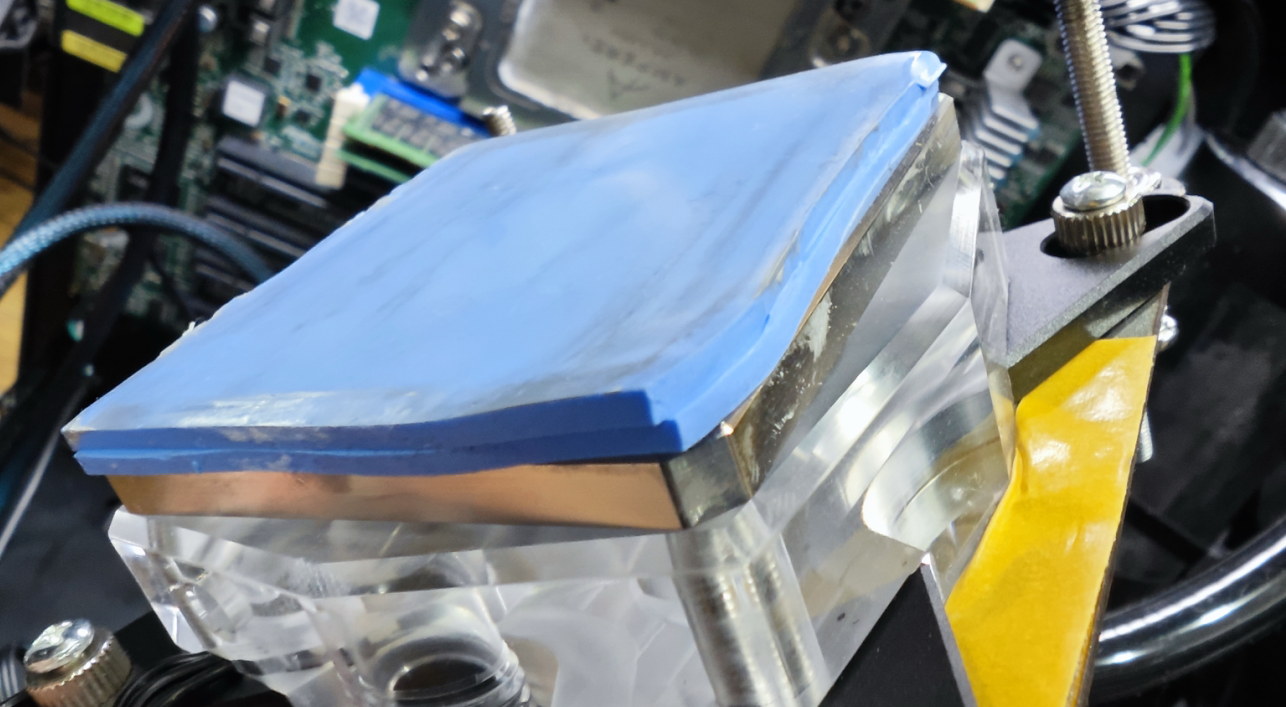
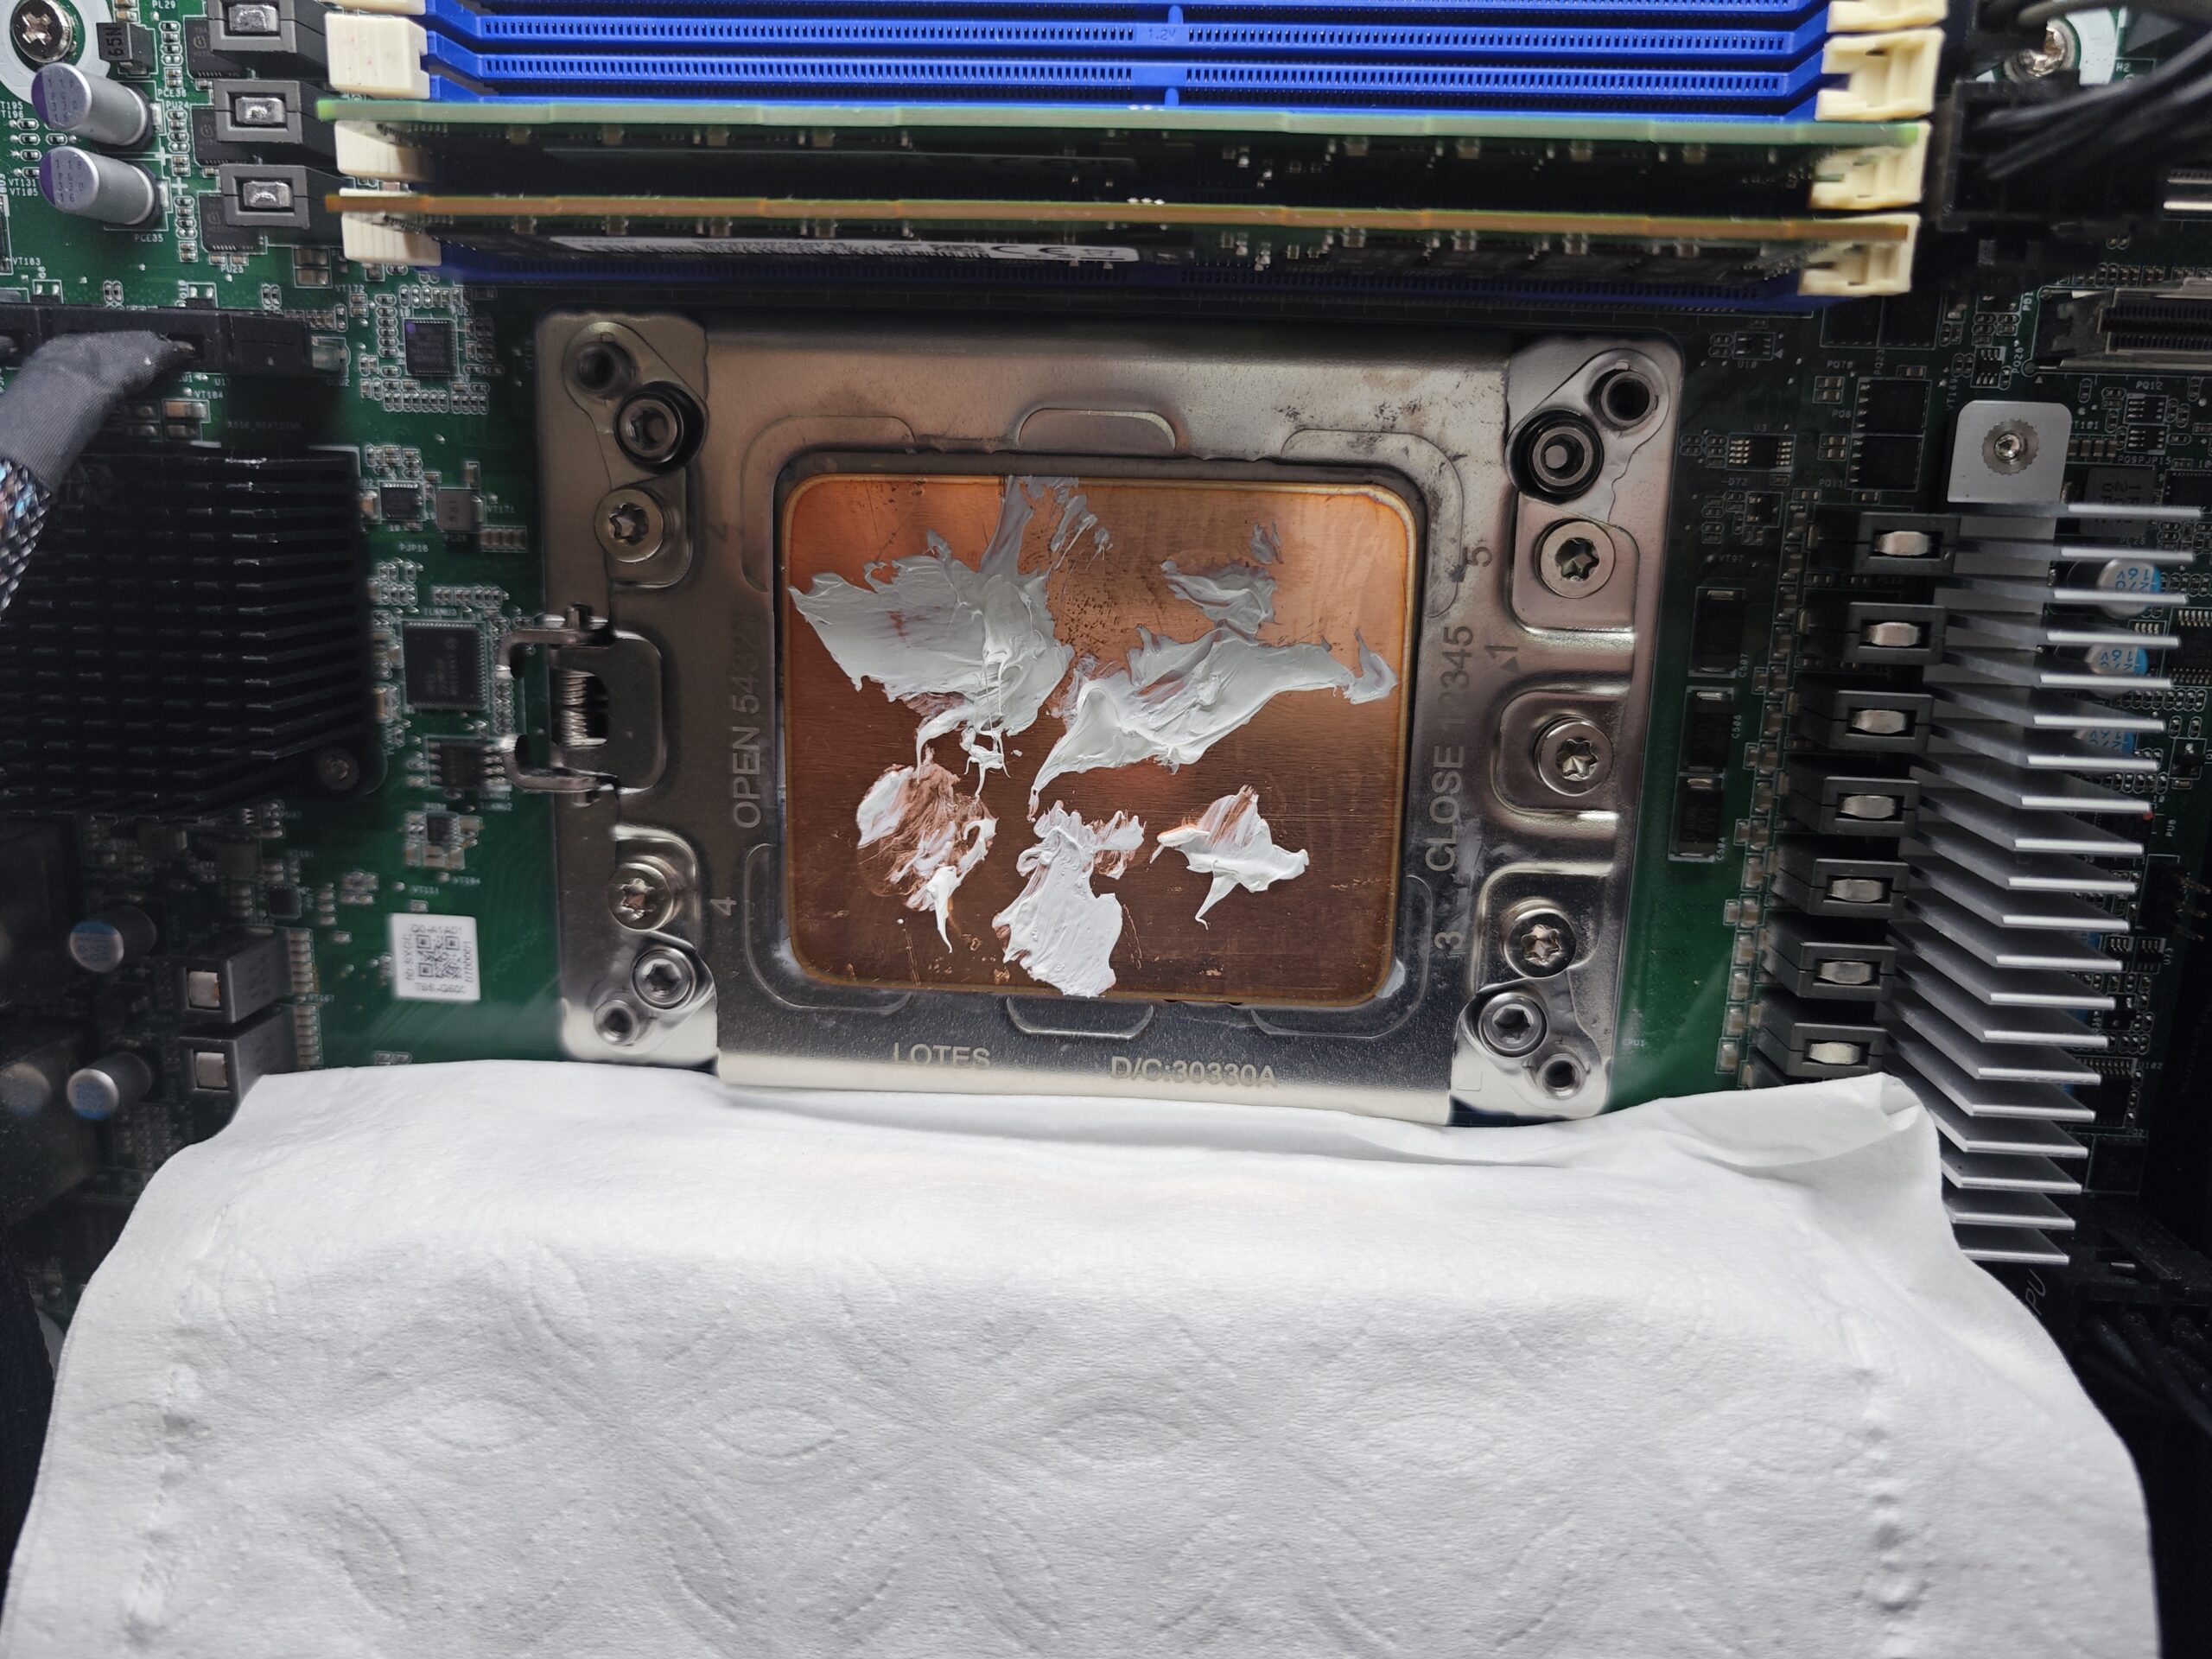
First, place the purple copper thermal pad, and remember to apply thermal paste before doing so.
Apply thermal paste before placing CPU water cooling block.
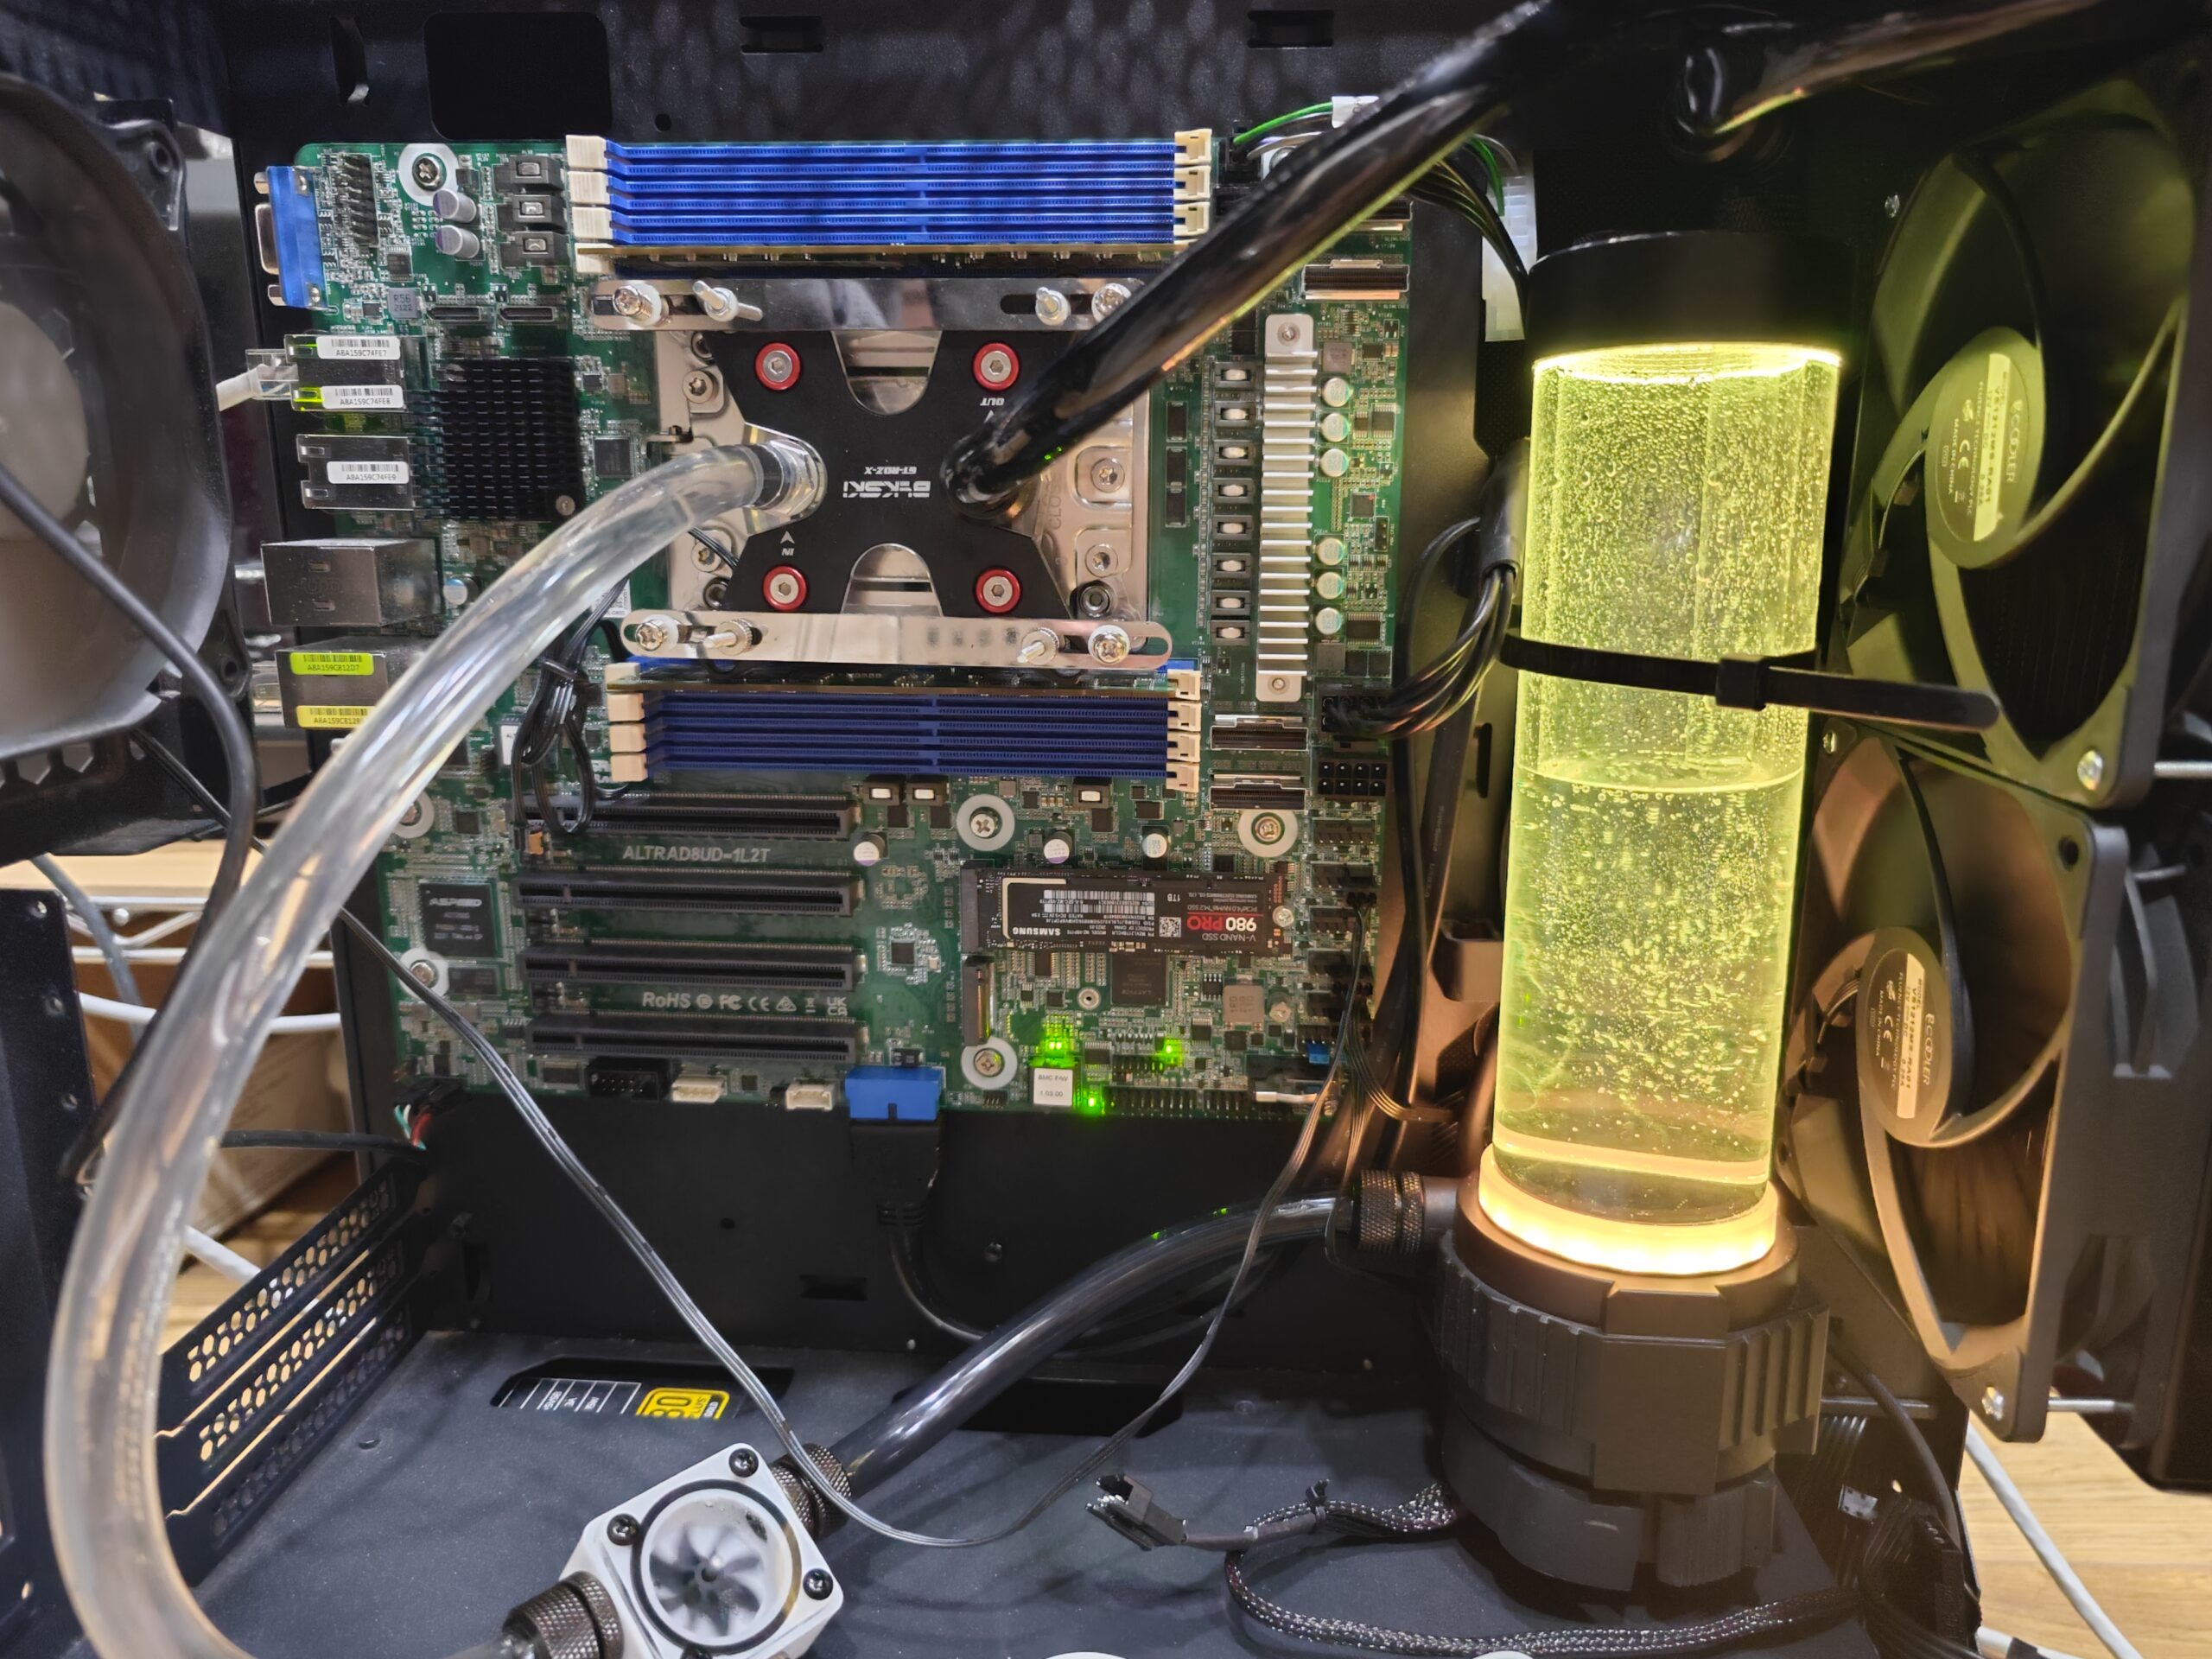
Assemble the components.
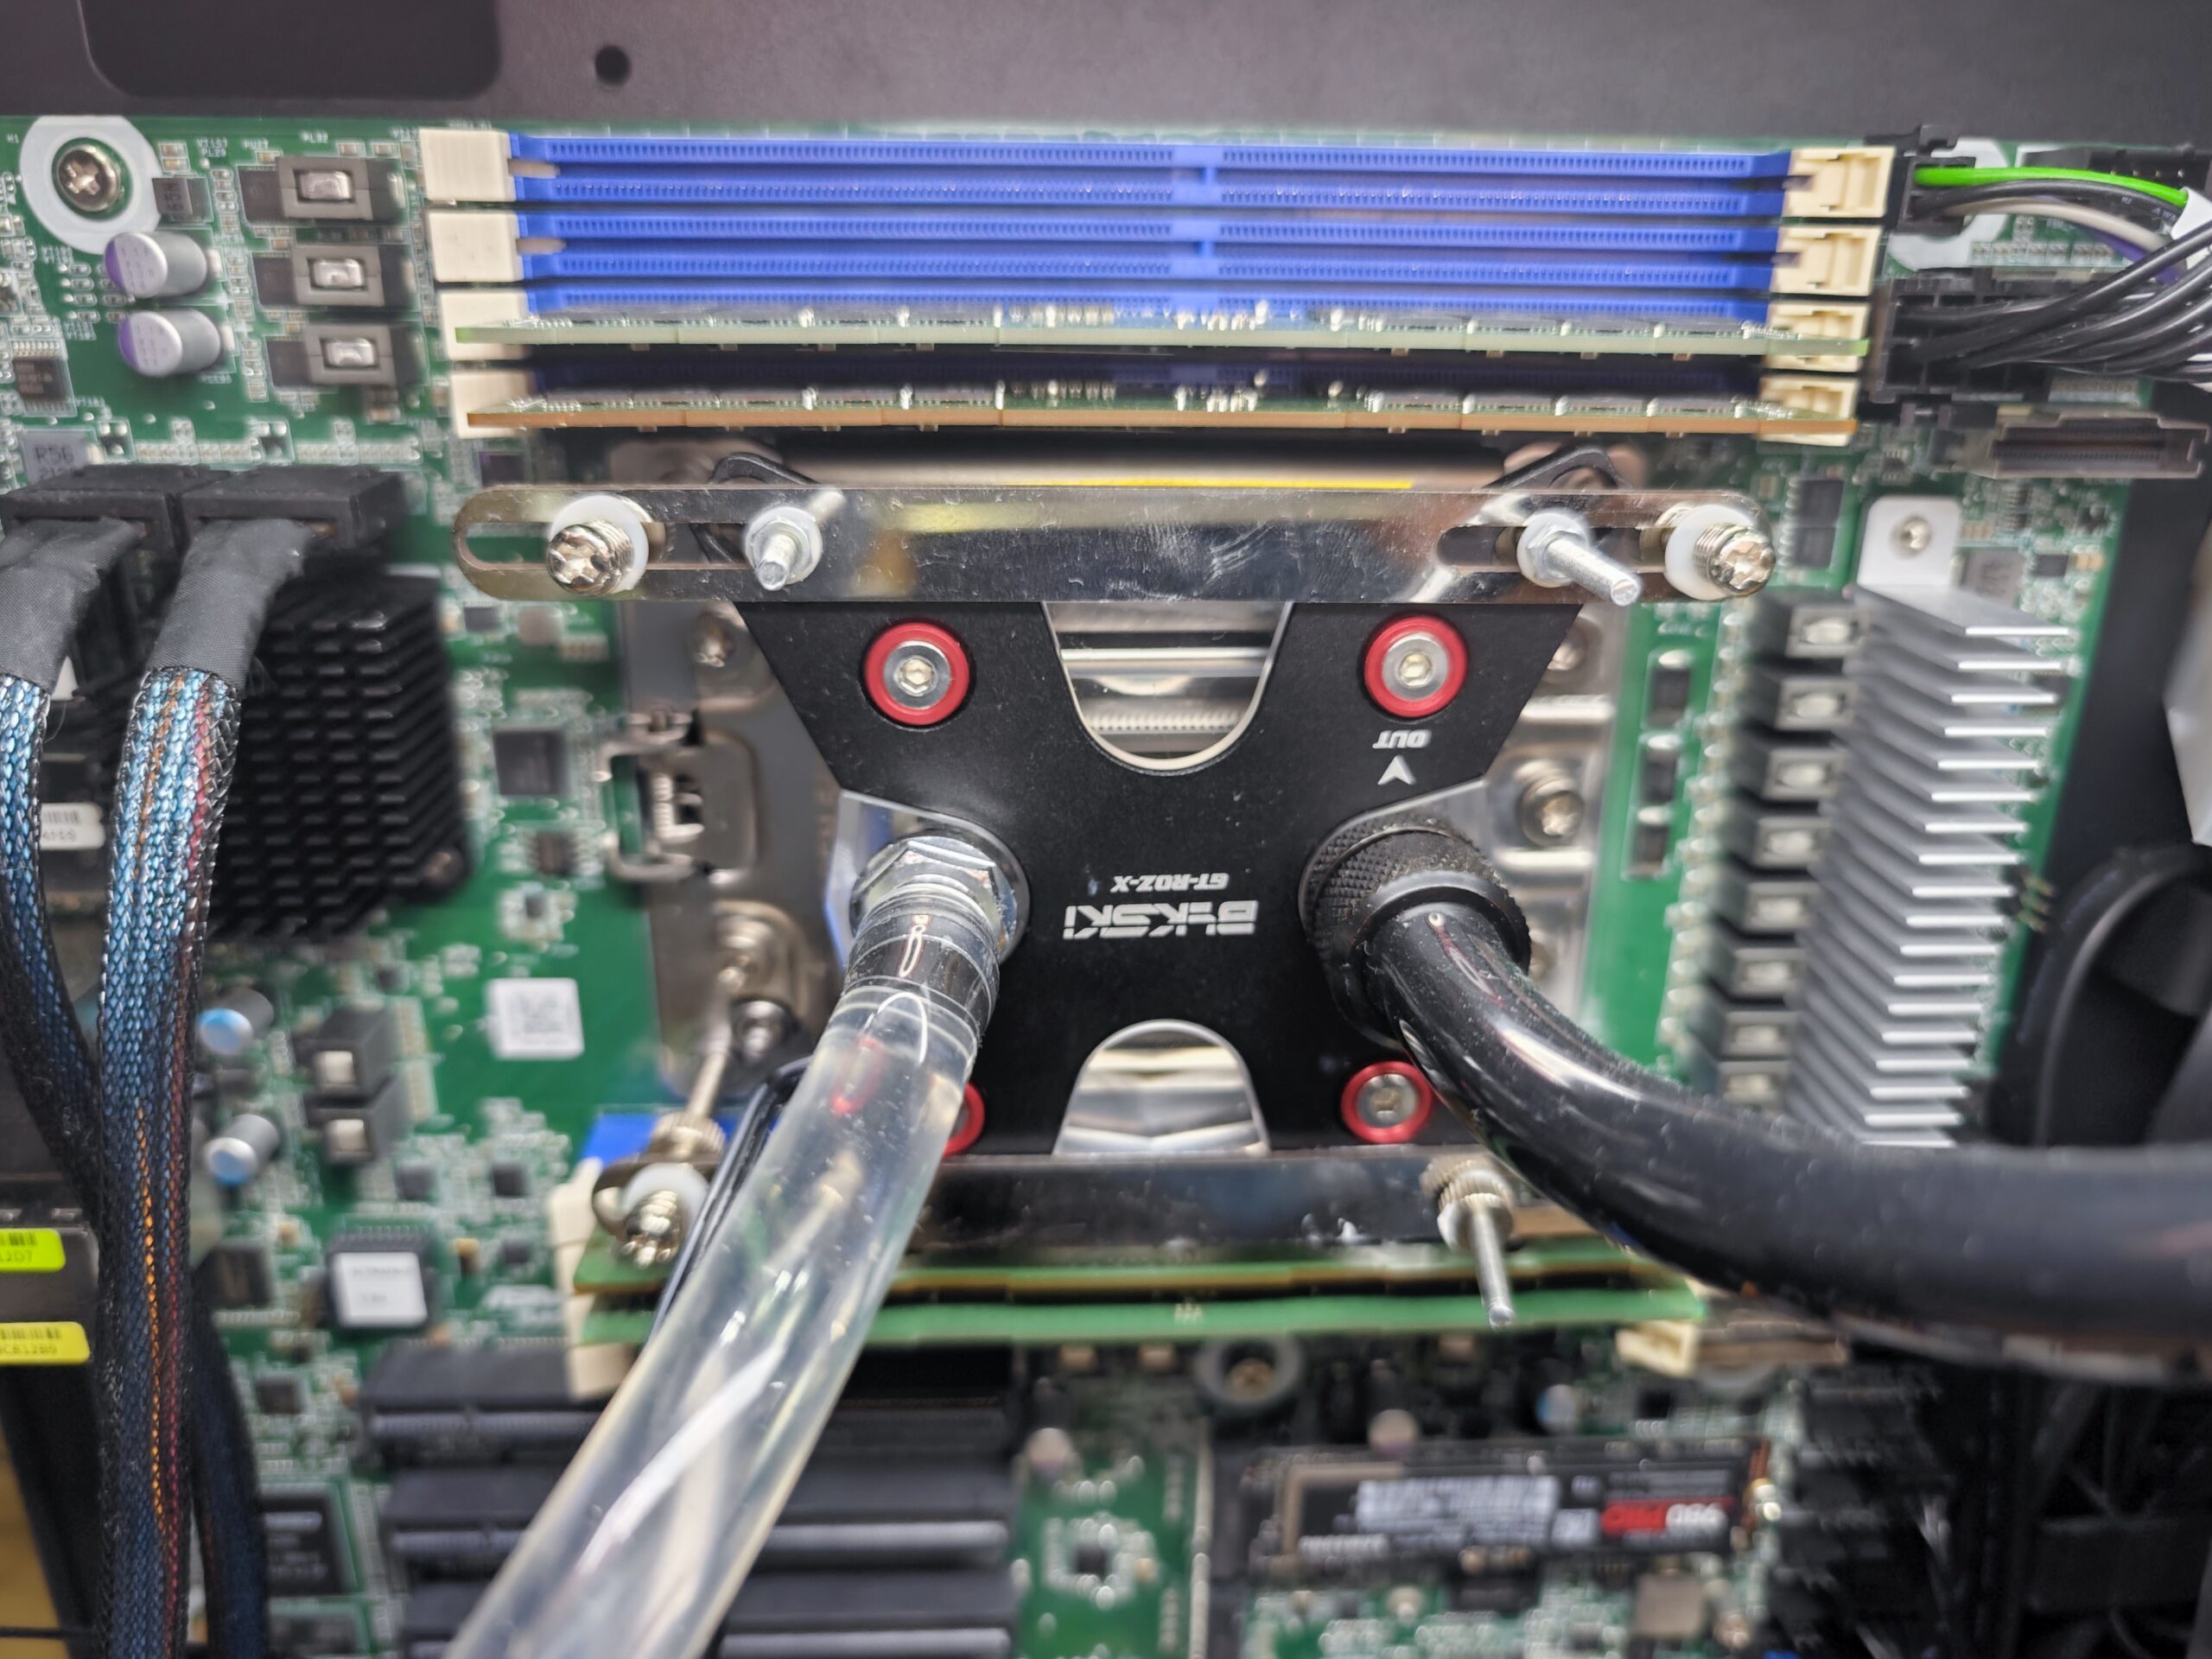
Actually, I assembled the tubing on the left side incorrectly. I’ll need to purchase materials and quick connectors to replace it when I have the time. But for now, let’s leave it as is and make do.
Overall view.
This way, it’s evident that the case isn’t ideal. It’s too cramped, affecting airflow, and it cannot accommodate the components properly.
Shopping
If you are interested in replicating my setup, all the components were purchased from Taobao. I spent extra for testing and experimenting, but in reality, you should be able to set up the entire cooling system for around US$100 or NTD$3,000. This is comparable to the cost of an efficient dual-fan tower cooler.
Since this is a Chinese website, I’ll keep the text in Chinese and provide English translations afterward.
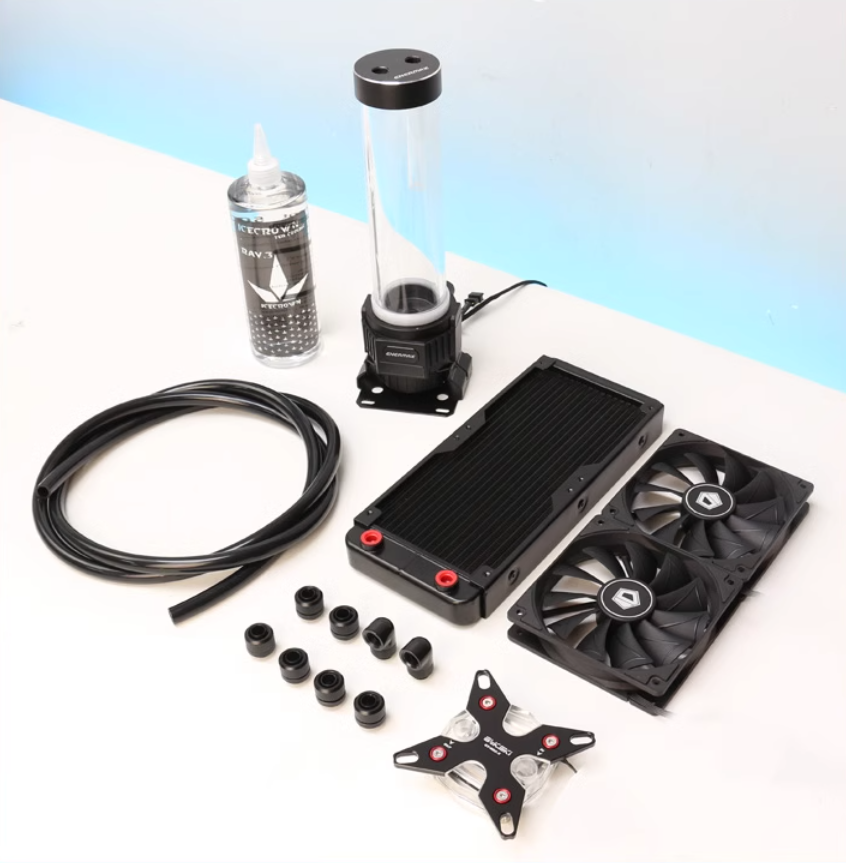
Liquid Cooling System
watertiger定制台式机电脑分体式CPU显卡水冷软管套装冷散热器 (“WaterTiger Custom Desktop Computer Split-Type CPU GPU Liquid Cooling Soft Tube Kit Radiator”)
Enter the URL choice “單 CPU 水冷 240 冷排” (“Single CPU Liquid Cooling 240 Radiator”)
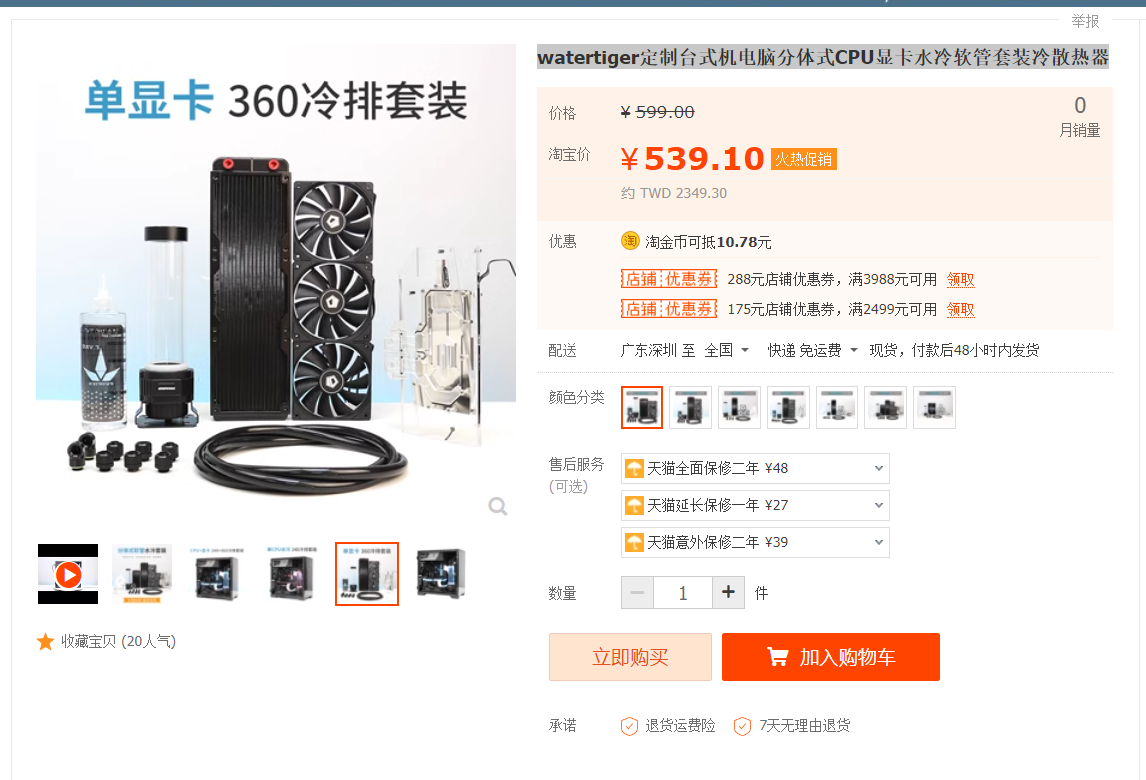
At first, I chose this brand because the photos looked appealing, but it turned out to be a fortunate coincidence that saved me a lot of exploration time. This brand integrates various components into a set for sale, and the components they use are of decent quality. For example, they use the Enermax NEOChanger as the water pump, which is also a good pump. If you are familiar enough, you might not need these kits.
This kit does not include a pressure relief valve. You’ll need to purchase a pressure relief valve separately, and depending on your needs, you might want to buy additional quick connectors
Clamping Fittings
All the components can be purchased from the same place, saving the hassle of searching everywhere. It’s a good idea to buy a few extra parts to avoid trouble later on. The time cost is much higher than the cost of the components.
电脑水冷头扣具卡具CPU显卡南北桥固定笔记本散热器压条五金夹具 (“Computer Water Cooling Head Fastening Fixture, CPU GPU North-South Bridge Fixing, Laptop Heatsink Clamp, Hardware Clamp”)
Choice 台式机CPU冷头扣具(“Desktop CPU Cooling Head Fastening Fixture”) *2
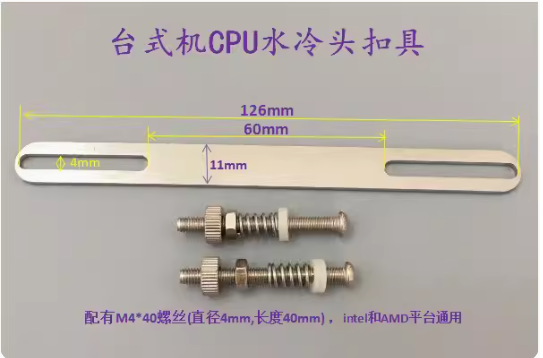
M2 M3 M4不锈钢平头盘头螺丝钉水冷头水冷排机箱风扇安装长螺丝 (“M2 M3 M4 Stainless Steel Flat Head Countersunk Screws for Water Cooling Head, Radiator, Case Fan Installation – Long Screws”)
Fastening fixtures for securing CPU coolers and water blocks. The components can be increased based on requirements. The minimum required quantity includes
M3手拧螺母 (M3 thumb nuts)*4,M3*30 (M3 screws) *4 ,M3垫片(M3 washers) *4 ,M3六角螺母(M3 hex nuts) *4
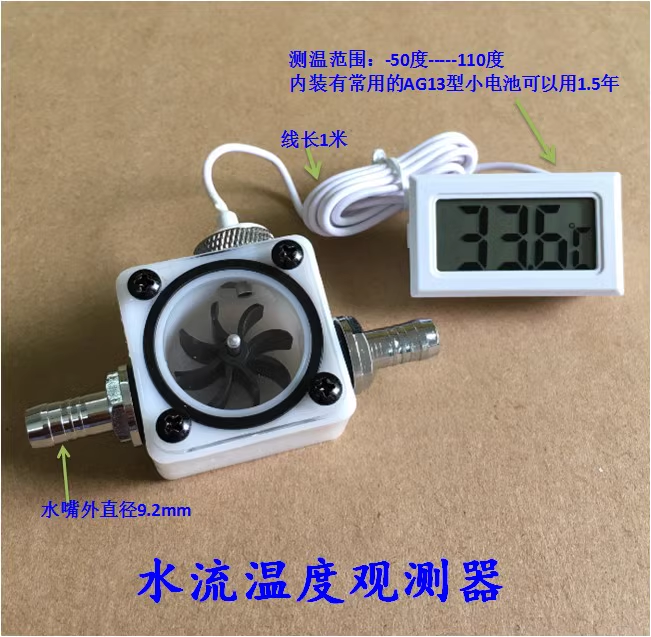
电脑水冷水流计 液冷散热器流量器 流体温度观测器透明水流指示计 (“Computer Liquid Cooling Flow Meter, Liquid Cooler Flow Indicator, Fluid Temperature Monitor Transparent Flow Meter”) (option)
Choice: 3孔水流观测器 + 温度计 (“3-Port Flow Meter + Thermometer for Water Flow Observation”)
Nice to have items, but it can make me feel better.
Test Result
This system feels relatively quiet and not noisy.
The following tests are only for verifying the liquid cooling setup and are not formal performance tests. The results are provided for liquid cooling reference and do not include testing power consumption, etc.
Room temperature: 25 degrees Celsius
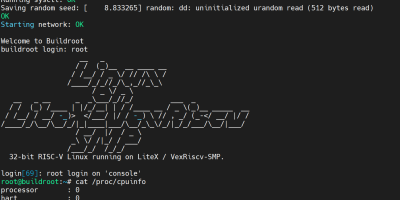
CPU : Ampere AltraMax 128-30
Run command : stress-ng –cpu 128 –iomix 128 –vm 128
Gentoo Linux kernel 6.6 ,CPU temperature is approximately,Power consumption CPU 150W/ IO 19W
Ubuntu 22.04 kernel 6.2(?),CPU temperature is approximately 72 degrees,Power consumption CPU 178W/ IO 20W
In conclusion, I hope this article has been helpful for those eager to try it out.
Afterword
Newegg has also listed another model, which is only the motherboard version, only US$849.-
ASRock Rack ALTRAD8UD-1L2T Deep Micro-ATX Server Motherboard Singel Socket (LGA 4926) Ampere Altra Max/Ampere Altra processors Dual 10G & 1G

發佈留言