

Sometime I feelt hat k8s make me frustrated, Latest time I wrote this document is 4 years ago, that’s old version, but when I want to use k8s as container manager again, seems that something different and network won’t work, original document cannot work anymore, it needs to have new document to record that.
My hardware also different, if you don’t have such powerful machine, it can skip numa part, that’s only for high end ARM64 machine.
The hardware is Ampere Mt. Collins which has 2*Ampere Altra 80 Cores CPU and 8*32G Memory, my experiment is run different VM on different CPU, to seperate them and lock it on different numa node.
There are two CPUs, so, it can create 3 nodes, so, I have plan to allocate resource like that.
1. k8s master on socket 0: 10 CPUs, 16G memory
2. k8s node1 on socket 0 : 70 CPUs, 100G memory
3. k8s node2 on socket 1: 80 CPUs, 120G memory
Kubernetes version v1.28.2
Ubuntu 22.04
Notice: Before reading this document, this document is personal experiment, not Ampere official document, take your own risk.
Prepare VM from libvirt
The server has remote control system which problem sufficent resolution to use GUI on server, so, I install ubuntu 22.04 on host system, than use virt-manager to create k8s master node, for qemu image, I create the disk image alone, seems create image when run install will allocate all disk space, seems that’s a virt-manager bug.
And the host network is configured to be a bridge interface, in my case, that’s br0.
So, when uses virt-manager to create VM, it can bridge network interface to br0.
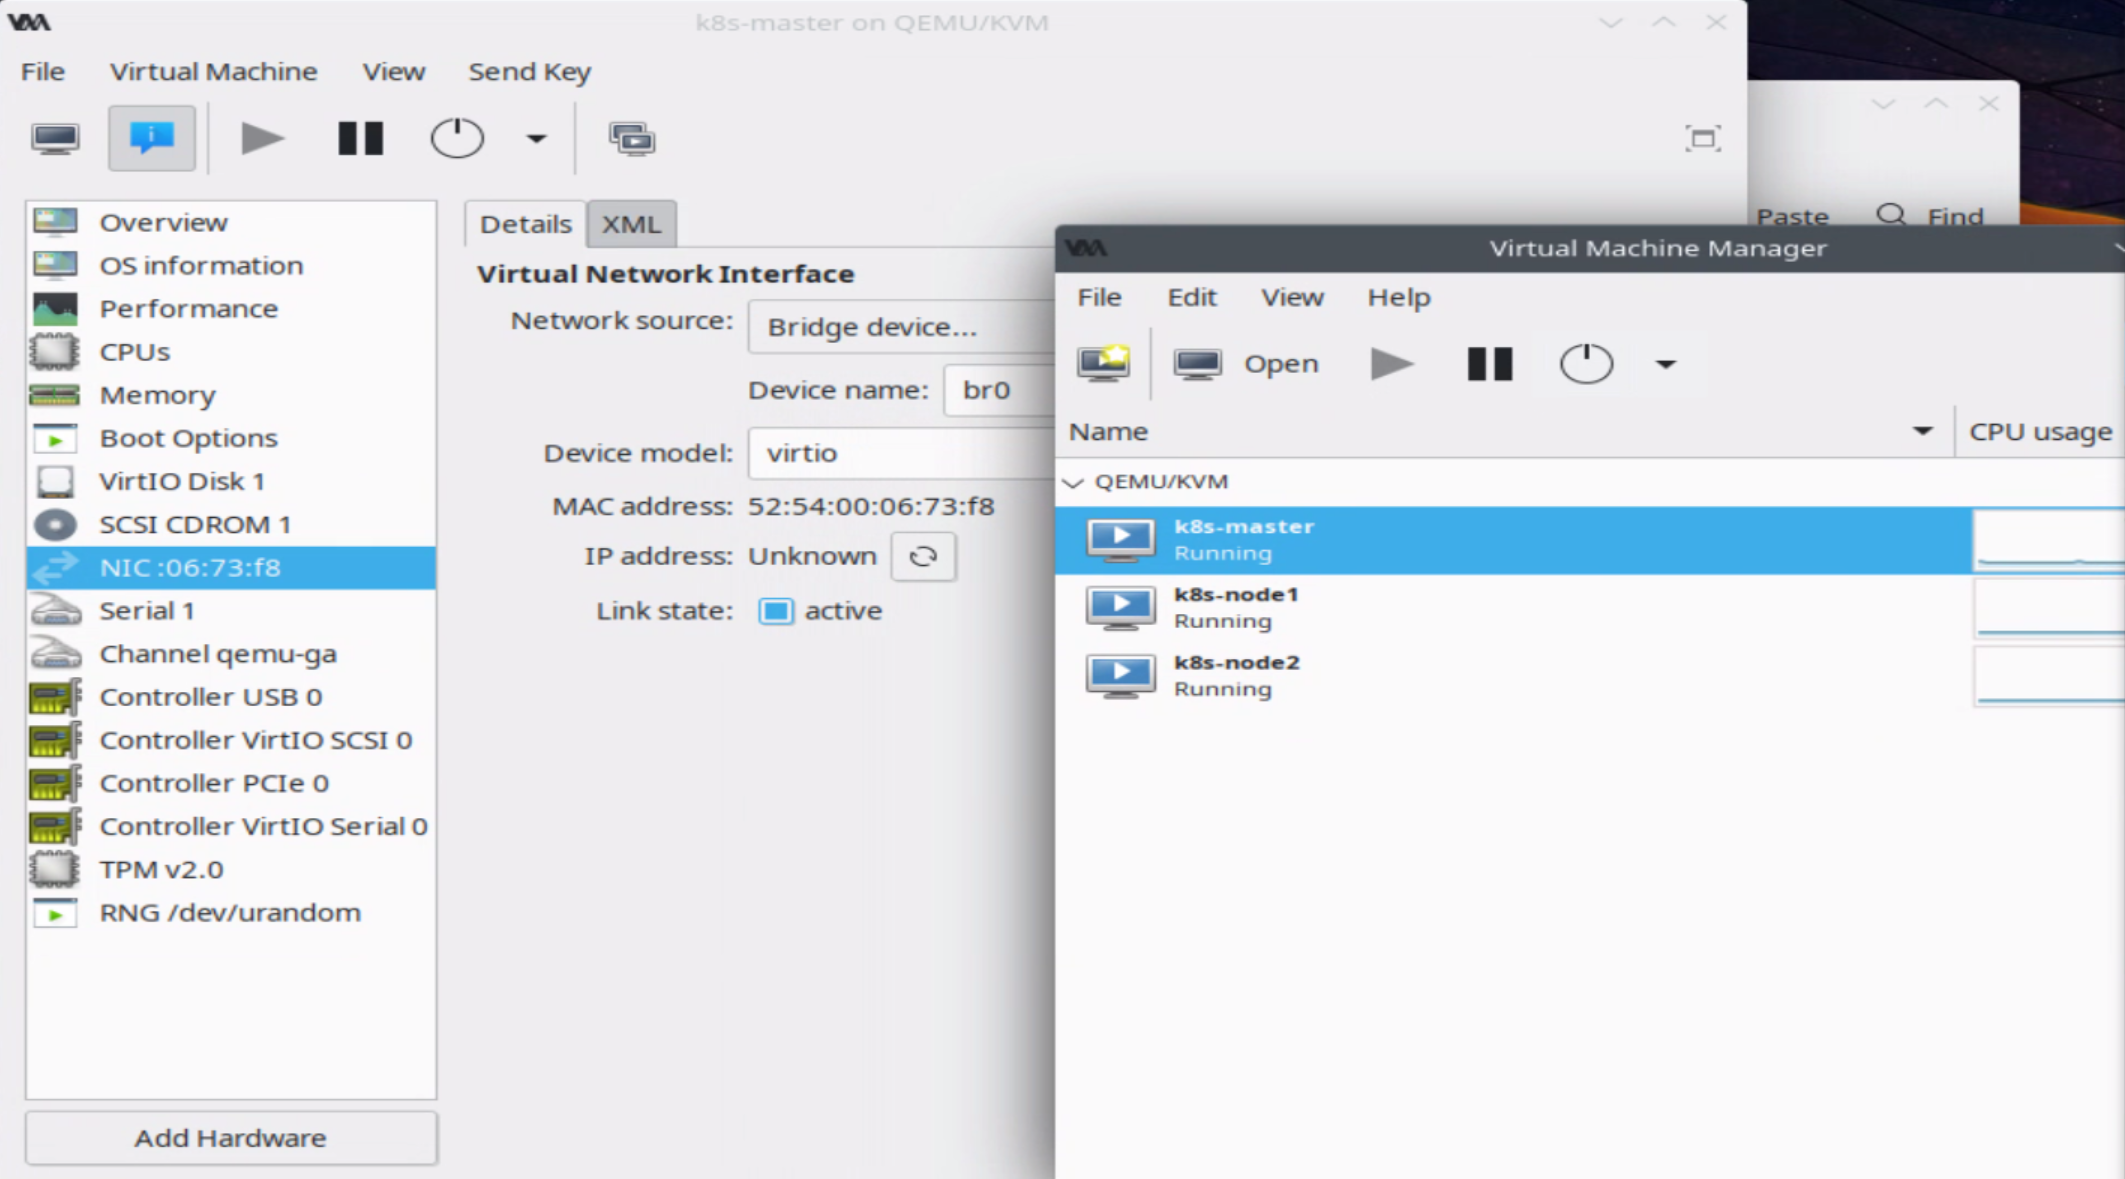
need to modify the /etc/hostname, /etc/hosts and /etc/netplan/00-installer-config.yaml in the guest.
Remeber to change the CPU number and memory size on virt-manager GUI, different VM needs to use different VM image. it can keep other options by default.
Configure the VM with Numa
It can use numastat to check currnet numa status, this system has two numa nodes. it can use numastat and numactl to get more numa information.
# numastat -n

Per-node numastat info (in MBs):
                          Node 0          Node 1           Total
                 --------------- --------------- ---------------
Numa_Hit               591239.17       791075.41      1382314.58
Numa_Miss                   0.00            0.00            0.00
Numa_Foreign                0.00            0.00            0.00
Interleave_Hit              8.63            7.13           15.77
Local_Node             519434.17       777974.99      1297409.16
Other_Node              71805.00        13100.42        84905.42

# numactl --hardware
available: 2 nodes (0-1)
node 0 cpus: 0 1 2 3 4 5 6 7 8 9 10 11 12 13 14 15 16 17 18 19 20 21 22 23 24 25 26 27 28 29 30 31 32 33 34 35 36 37 38 39 40 41 42 43 44 45 46 47 48 49 50 51 52 53 54 55 56 57 58 59 60 61 62 63 64 65 66 67 68 69 70 71 72 73 74 75 76 77 78 79
node 0 size: 128377 MB
node 0 free: 80224 MB
node 1 cpus: 80 81 82 83 84 85 86 87 88 89 90 91 92 93 94 95 96 97 98 99 100 101 102 103 104 105 106 107 108 109 110 111 112 113 114 115 116 117 118 119 120 121 122 123 124 125 126 127 128 129 130 131 132 133 134 135 136 137 138 139 140 141 142 143 144 145 146 147 148 149 150 151 152 153 154 155 156 157 158 159
node 1 size: 126426 MB
node 1 free: 93888 MB
node distances:
node   0   1
  0:  10  20
  1:  20  10
virt-manager doesn’t have advance command to assign CPU, probably modify xml can get that purpose, but it more converince to use the “virsh” cli command to adjust VM parameters. “virsh list” show current VMs, “virsh vcpupin list current VM CPU scheduling”, “virsh vcpupin domain-id vcpu cpulist” to modify the VCPU run on which one CPU.
For memory, it needs to use “virsh numatune” to lock the memory on different node.
“virsh numatune domain [–mode mode] [–nodeset nodeset] [[–config] [–live] | [–current]]”, –current can update current running VM machine.
$ virsh list
 Id   Name          State
-----------------------------
 9    k8s-master   running
 10   k8s-node1     running

$ virsh vcpupin k8s-master
 VCPU   CPU Affinity
----------------------
 0      0-159
 1      0-159
 2      0-159
 3      0-159
 4      0-159
 5      0-159
 6      0-159
 7      0-159
 8      0-159
 9      0-159

# this command can lock 9 k8s-master's VCPU 0 on physical CPU 0.
$ virsh vcpupin 9 0 0

# Show current VM's numatune, for example, following is unset status.
$ virsh numatune 9
numa_mode      : strict
numa_nodeset   :

$ virsh numatune 9 --nodeset 0

# the numa_nodeset was set to 0
$ virsh numatune 9
numa_mode      : strict
numa_nodeset   : 0
The problem is, seems this script need to run everytime, alternativate solution is to modify XML, but Mt. collis has 160 cores, I won’t to modify the XML file. script is more converience on this situation, following is my sample script to adjust k8s-master, k8s-node1, and k8s-node2’s parameter, it can easy to modify it if you install other system or AltraMax CPU.
#!/bin/bash

configure_vm(){
        local VM_NAME="$1"
        local VM_VCPU="$2"
        local VM_CPU="$3"
        local VM_NUMA="$4"
        local VM_TYPE="$5" # VM_TYPE for MASTER or NODE0, NODE1 .. self define name

        id=$(virsh list | grep $VM_NAME | awk '{print $1}')
        state=$(virsh list | grep $VM_NAME | awk '{print $3}')

        if [ "$state" != "running" ]; then
          echo "$VM_TYPE is not running"
          exit 1
        else
          echo "configure $VM_TYPE"
        fi
        numa_nodeset=$(virsh numatune $id | grep numa_nodeset | awk '{print $3}')

        start_cpu=$(echo $VM_VCPU | cut -d'-' -f1)
        end_cpu=$(echo $VM_VCPU | cut -d'-' -f2)
        for ((vcpu = start_cpu; vcpu <= end_cpu; vcpu++)); do
          # echo "$id $vcpu $VM_CPU"
          virsh vcpupin $id $vcpu $VM_CPU > /dev/null
        done
        if [ -n "$numa_nodeset" ]; then
          echo "$VM_TYPE numa_nodeset is $numa_nodeset"
        else
          # echo "$id $VM_NUMA"
          virsh numatune $id --nodeset $VM_NUMA
        fi

}

configure_vm "k8s-master" "0-9" "0-9" "0" "Master"
configure_vm "k8s-node1" "0-69" "10-79" "0" "Node0"
configure_vm "k8s-node2" "0-79" "80-159" "1" "Node1"


====

# After run the script, it can run numastat <pid> to see the qemu runs numa status. ex:
$ sudo numastat 206601

Per-node process memory usage (in MBs) for PID 206601 (qemu-system-aar)
                           Node 0          Node 1           Total
                  --------------- --------------- ---------------
Huge                         0.00            0.00            0.00
Heap                        11.51            0.00           11.51
Stack                        0.04            0.00            0.04
Private                   5984.93            0.00         5984.94
----------------  --------------- --------------- ---------------
Total                     5996.48            0.00         5996.48
In here, on socket 0 , 0-9 and 0-69 is vcpu, so, all start from 0. After run this script, it can use “virsh vcpupin” and “virsh numatune” to get current setting. Maybe cpuset parameter in XML can more easy to get this function, but I have not try it.
Install K8s
Here is my script, just reference some later blog and my previous configurtion script, so, it can copy and paste to system and run it directly.
Install basic system and k8s
# setup timezone
sudo apt install ntpdate -y
sudo ntpdate watch.stdtime.gov.tw
sudo timedatectl set-timezone Asia/Taipei

# install and enable docker

sudo curl -fsSL https://download.docker.com/linux/ubuntu/gpg | sudo gpg --dearmour -o /etc/apt/trusted.gpg.d/docker.gpg
sudo add-apt-repository "deb [arch=$(dpkg --print-architecture)] https://download.docker.com/linux/ubuntu $(lsb_release -cs) stable"

sudo apt update
sudo apt install -y containerd.io


containerd config default | sudo tee /etc/containerd/config.toml >/dev/null 2>&1
sudo sed -i 's/SystemdCgroup \= false/SystemdCgroup \= true/g' /etc/containerd/config.toml

sudo systemctl restart containerd
sudo systemctl enable containerd

echo "----------------"
echo "   swapoff"
echo "----------------"
sudo swapoff -a
sudo sed -i '/swap/ s/^\(.*\)$/#/g' /etc/fstab

# Install k8s
sudo apt -y install apt-transport-https curl
curl -s https://packages.cloud.google.com/apt/doc/apt-key.gpg | sudo apt-key add
sudo apt-add-repository "deb http://apt.kubernetes.io/ kubernetes-xenial main"
sudo apt update

sudo apt-get -y install kubelet
sudo apt-get -y install kubeadm
sudo apt-get -y install kubectl
sudo apt-mark hold kubelet kubeadm kubectl

# Update kernel parametes
cat <<EOF | sudo tee /etc/sysctl.d/99-kubernetes-cri.conf
net.bridge.bridge-nf-call-iptables  = 1
net.ipv4.ip_forward                 = 1
net.bridge.bridge-nf-call-ip6tables = 1
EOF

# update sysctl
sudo sysctl --system

sudo tee /etc/modules-load.d/containerd.conf <<EOF
overlay
br_netfilter
EOF
sudo modprobe overlay
sudo modprobe br_netfilter

echo "if this is work node, it can run kubeadm join now"

echo "alias k=kubectl" >> .bashrc
Setup Master Node
Run this script on master node.
sudo kubeadm init --pod-network-cidr=10.244.0.0/16
mkdir -p $HOME/.kube
sudo cp -i /etc/kubernetes/admin.conf $HOME/.kube/config
sudo chown $(id -u):$(id -g) $HOME/.kube/config

# echo "enable master to run pods"
# kubectl taint nodes --all node-role.kubernetes.io/master-
It will shows some message below, then run it on k8s-node1 and k8s-node2
kubeadm join 192.168.110.230:6443 –token e14f7k.35c3jpny81ry70re \
–discovery-token-ca-cert-hash sha256:6636a7e4ec3542f19152f308f0789c52287b743b60efa3c13e7c23ce1147c581
If forgot command above, it can create another token to let other k8s node join, ex:
kubeadm token create --print-join-command
Flannel : Network fabric for container
K8s need a network fabric to provide internal network topology, there are many choices, but we will install matellb later, some other network like calico might have potential issue, so, we choice flannel as network fabric.
kubectl apply -f https://github.com/flannel-io/flannel/releases/latest/download/kube-flannel.yml
After run this command, the k8s node status will change to Ready, if not install network fabric, the node status will be NotReady.
$ kubectl get nodes
NAME         STATUS   ROLES           AGE   VERSION
k8s-master   Ready    control-plane   26h   v1.28.2
k8s-node1    Ready    <none>          26h   v1.28.2
k8s-node2    Ready    <none>          26h   v1.28.2
Helm: Kubbernetes Applications Manager
Install helm to further install metallb purpose, on previous article, helm2 needs another application to connect to k8s, but helm3 doesn’t need it, more easy to use on k8s.
curl -fsSL https://raw.githubusercontent.com/helm/helm/main/scripts/get-helm-3 -o /tmp/get_helm.sh
chmod 700 /tmp/get_helm.sh
sudo /tmp/get_helm.sh
Metallb: Bere metal load-balancer for K8s
Install k8s on private side, it needs load-balancer to provide external IP to communication with internet or intranet. If you install Metallb, the “kubectl get svc”, the EXTERNAL-IP shows “Pending”, and k8s doesn’t response the arp on host, probably it doesn’t configure kube-proxy, it you have experience on previous metallb installtion, it might miss this part.
PATH=$PATH:/usr/local/bin/

helm repo add metallb https://metallb.github.io/metallb
helm --namespace metallb-system install --create-namespace metallb metallb/metallb -f metallb-values.yaml

# https://metallb.universe.tf/installation/
# see what changes would be made, returns nonzero returncode if different
kubectl get configmap kube-proxy -n kube-system -o yaml | \
        sed -e "s/strictARP: false/strictARP: true/" | \
        kubectl diff -f - -n kube-system

# actually apply the changes, returns nonzero returncode on errors only
kubectl get configmap kube-proxy -n kube-system -o yaml | \
        sed -e "s/strictARP: false/strictARP: true/" | \
        kubectl apply -f - -n kube-system
metallb-values.yaml is also different like previous setting, it needs to configure L2Advertisement on metallb, without it, your metallb won’t work. Follwing is metallb-values.yaml file.
apiVersion: metallb.io/v1beta1
kind: IPAddressPool
metadata:
  name: primary-pool
  namespace: metallb-system
spec:
  addresses:
  - 192.168.110.200-192.168.110.219

---
apiVersion: metallb.io/v1beta1
kind: L2Advertisement
metadata:
  name: l2adv
  namespace: metallb-system
spec:
  ipAddressPools:
  - primary-pool
Traefik: TBD
Linkerd
Just show the install script here
curl --proto '=https' --tlsv1.2 -sSfL https://run.linkerd.io/install | sh

echo "export PATH=$PATH:/home/$USER/.linkerd2/bin" >> ~/.bashrc

linkerd install --crds | kubectl apply -f -
linkerd install | kubectl apply -f -
linkerd viz install | kubectl apply -f -
Other
it can insert isolinux to host linux kernel parameter to isolate the Linux scheduling to k8s nodes. (TBD)
isolcpus=10-159 nohz=on nohz_full=10-159
Test with Nginx
It can deploy nginx to test this system
kubectl create deploy nginx --image=nginx
kubectl expose deploy nginx --port=80 --target-port=80 --type=LoadBalancer
kubectl get svc nginx
NAME    TYPE           CLUSTER-IP      EXTERNAL-IP       PORT(S)        AGE
nginx   LoadBalancer   10.99.211.255   192.168.110.200   80:31011/TCP   25h
Now, it can try to access http://192.168.110.200.
if want to Delete nginx deploy, run following command.
kubectl delete deploy nginx
kubectl delete svc nginx
Test Numa
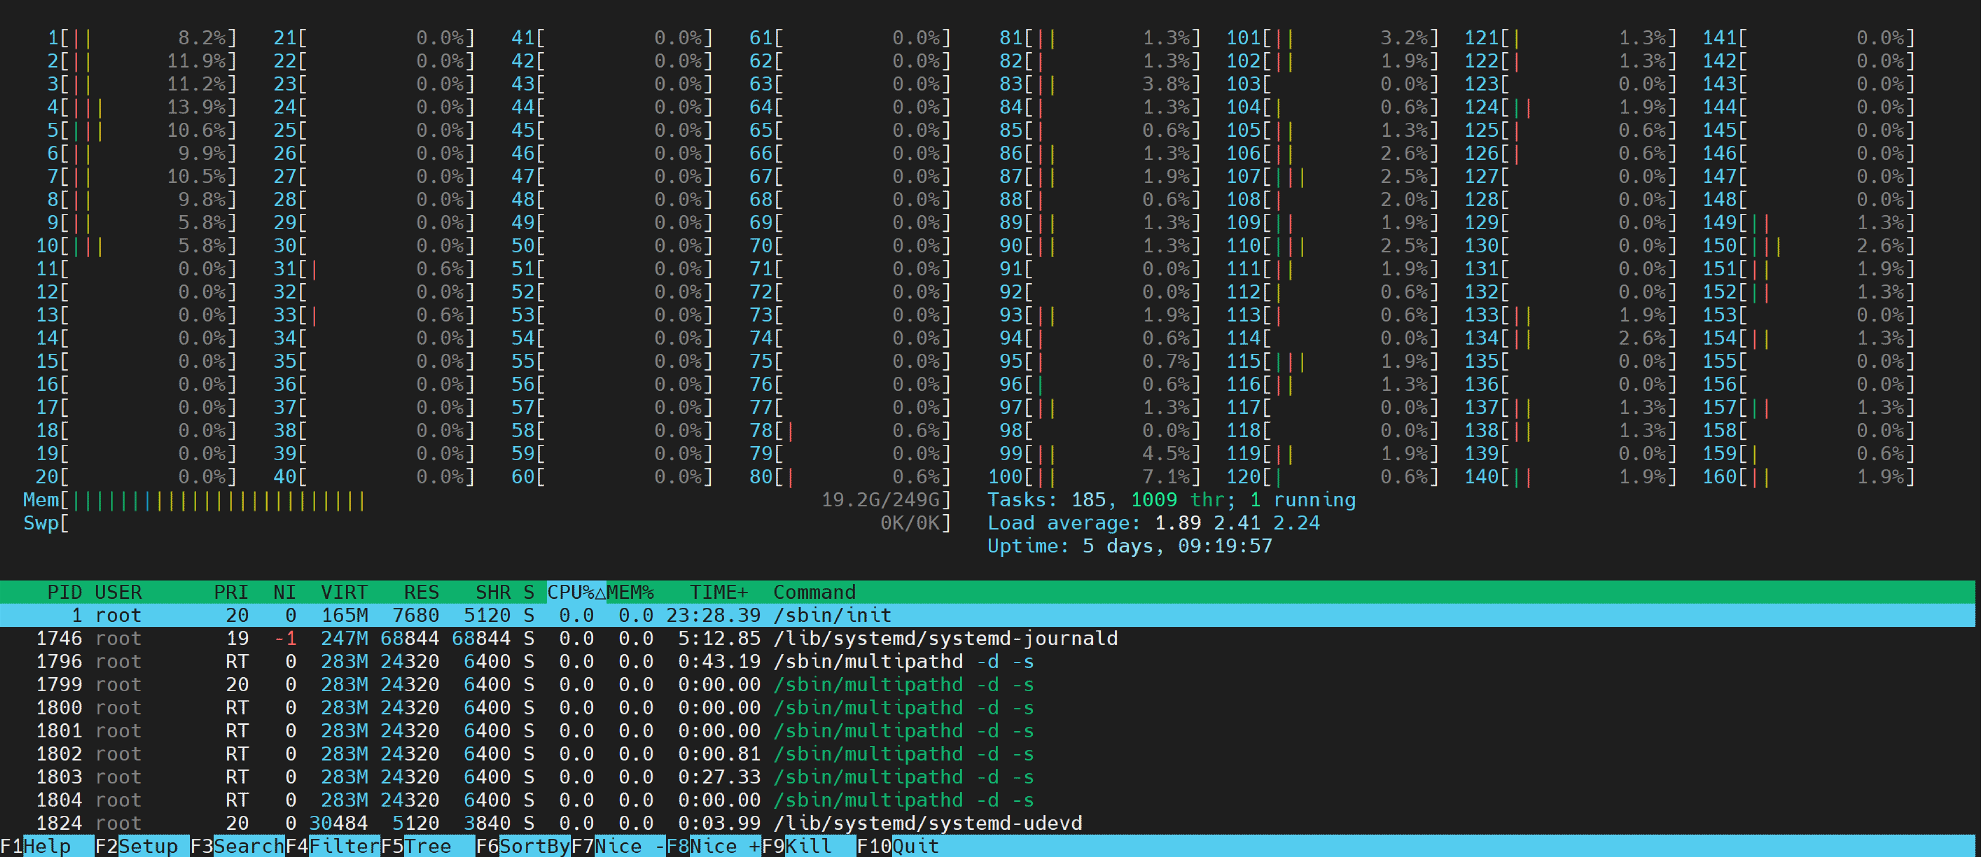
It can run emojivoto to test the system only runs on socket1, use it because it can general a lot of traffic between pods.
curl --proto '=https' --tlsv1.2 -sSfL https://run.linkerd.io/emojivoto.yml \
  | kubectl apply -f -
Now it can use htop to show all CPUs, and we can see most traffic on CPU 1~10 and 81~160. There are a little CPU usage on CPU 78 and 80, but it should be Linux regular scheduling(I have not add isocpu to host CPU this time)
ARM64 Kubernetes Nginx Traefik Ingress Load Balance
Install Kubernetes on ARM64 Ubuntu 18.04 (with QEMU)
Kubernetes install nginx-ingress on ARM64
TROUBLESHOOTING METALLB
Reassignment Duplicate IP after deleting IP pool #1591
9.3. libvirt NUMA Tuning

發佈留言